How to create a modal window in WebCenter Sites Contributor UI (11.1.1.8)
If you have been working on WCS for a while, you have probably run into situations where you need to customize the contributor UI. WCS has provided some hooks for this, but often the documentation is too basic and requires more research and reverse engineering.
In an effort to shed some light into UI customization, at Function1 we have authored a series of UI customization blogs: How to build custom attribute editors in WebCenter Sites 11.1.1.8, Customizing Toolbar Buttons in Oracle WebCenter Sites & Altering WebCenter Sites 11g R1.
Adding to this list, in this blog, I will detail how to create a modal window from a UI top menu item. Introductory details on customizing the menu bar can be found in the official WCS documentation here. WCS contributor UI is built using Dojo libraries. I will be utilizing dojo components in the sample provided. More information about Dojo can be found at the official site http://dojotoolkit.org/.
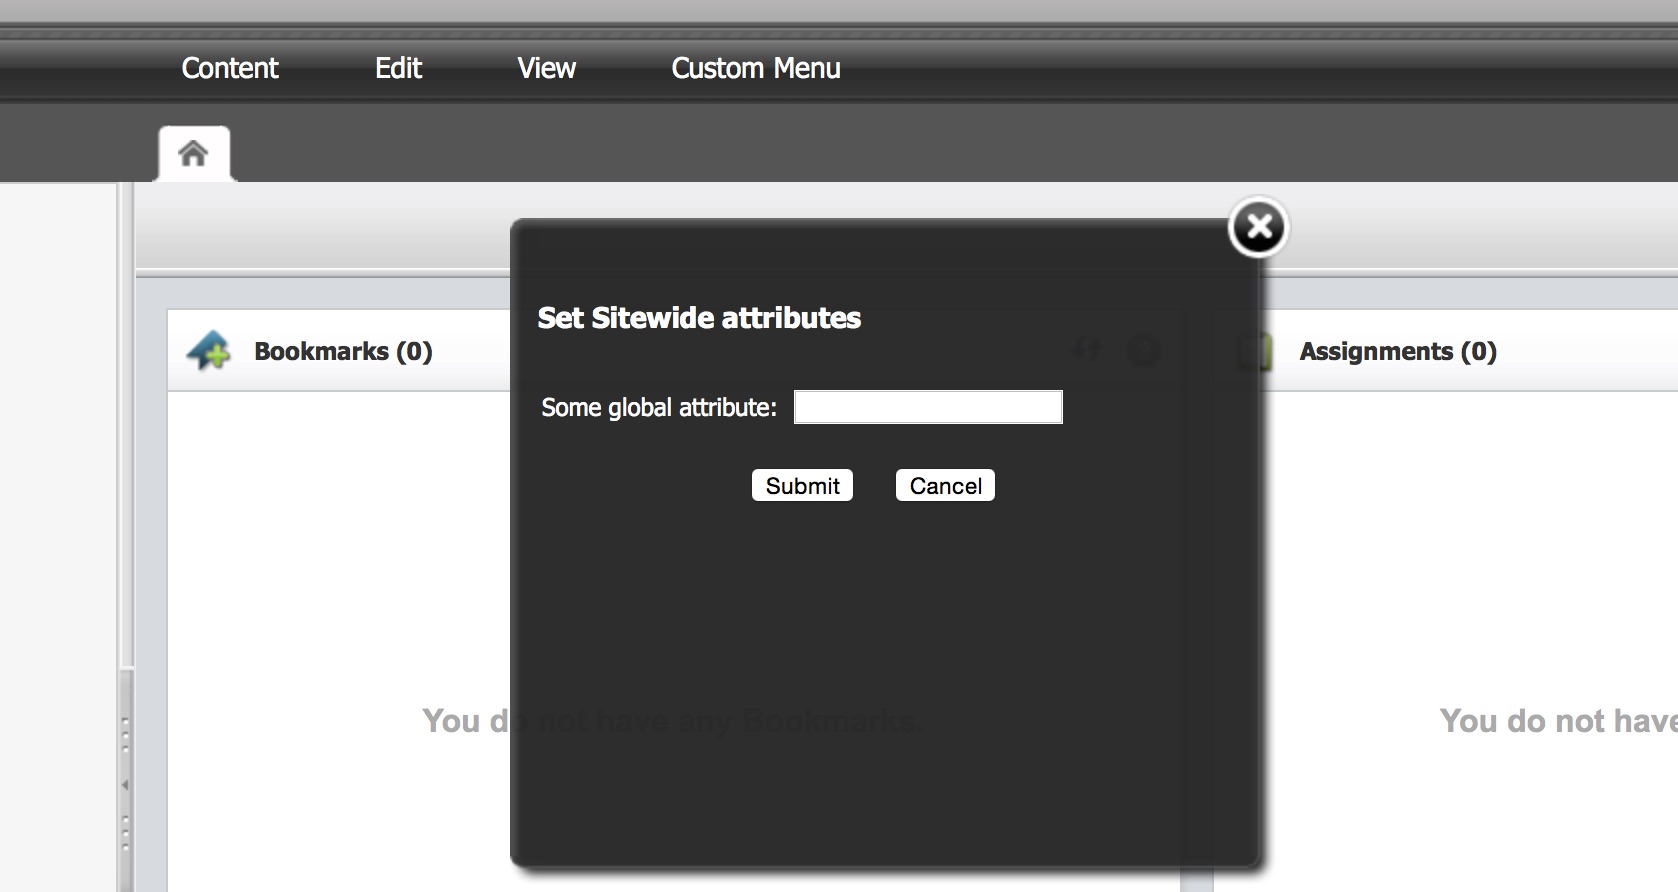
In the included code samples, I am providing a use case in which a modal window is launched from the menu. In this window, some global/site-wide parameter is set. On closing the window, another action is triggered, like "open an asset tab". The first part of this exercise is to add a custom menu item, then secondly, wire this menu item to trigger a modal window. Adding a custom menu item is straight forward. Any enhancements to the UI menu is accomplished by adding appropriate code to SiteConfigHtml element. This element can be added at a global or at a site level. Please refer to the above mentioned WCS official documentation for more details about this.
CustomElements/UI/Config/SiteConfigHtml
                Vs
CustomElements/<name of your WCS site>/UI/Config/SiteConfigHtml
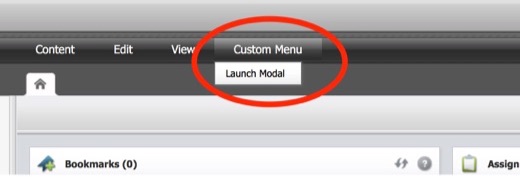
Below are the lines of code required to set up a new menu called "Custom Menu" and a menu item called "Launch Modal"
webcenter.sites['${param.namespace}'] = function (config) {
  config.menubar["default"] = config.menubar["default"].slice(0);
  config.menubar["default"].push({
	"id": "customMenu",
	"label": "Custom Menu",
	"children": [
		{label: "Launch Modal", action: config.myActions.selectCustomMenu}
	]
  })
}
A modal dialog can be implemented by using an existing WCS implementation of "dijit.dialog" called “fw.ui.dijit.FloatingDialog”. Below are the lines of code required to create a modal window.
dojo.require("fw.ui.dijit.FloatingDialog");
var sampleWCSDijitDialog = new fw.ui.dijit.FloatingDialog({
	id:"customModal",
	style: "width: 350px !important; height: 300px !important; border:1px !important;
               color: #FFFFFF !important;",
	onHide: dojo.hitch(this, function(){
	  dijit.byId("customModal").destroyRecursive();
	})
})
In the above code snippet, I am creating a new instance of FloatingDialog, adding an "id" and "style" attribute. Also adding an "onHide" event to destroy the modal instance and any other widgets contained within, on close of the modal window. Old instances will need to be destroyed on closing the modal window (onHide event) to avoid id conflicts while reopening the model window within the same browser session.
Here is a full working copy of the code. In this code snippet, an ajax call (using dojo.xhrGet) is being made to a WCS element. Any server side logic can be executed in this element. Response from this element is written back into the modal window.
webcenter.sites['${param.namespace}'] = function (config) {
   config.myActions = {
     selectCustomMenu: function (args) {
     var deferred = dojo.xhrGet({
     url: "/cs/ContentServer?pagename=SampleSite/Dispatcher&elementName=ModalLogicFront",
     load: function(response) {
     }
   });
   dojo.require("fw.ui.dijit.FloatingDialog");
     var sampleWCSDijitDialog = new fw.ui.dijit.FloatingDialog({
	id:"customModal",
	style: "width: 350px !important; height: 300px !important;
                border:1px !important; color: #FFFFFF !important;",
	onHide: dojo.hitch(this, function(){
	  dijit.byId("customModal").destroyRecursive();
	})
     })
   deferred.then(function(response){
        sampleWCSDijitDialog.containerNode.innerHTML = response;
   });
   sampleWCSDijitDialog.show();
 }};

 config.menubar["default"] = config.menubar["default"].slice(0);
 config.menubar["default"].push({
       "id": "customMenu",
       "label": "Custom Menu",
       "children": [
		{label: "Launch Modal", action: config.myActions.selectCustomMenu}
	]
  })
}
You could also execute other follow up actions from this modal, for eg: open an asset edit tab on close of this modal window. This could be accomplished by adding the following code to the onHide event:
SitesApp.event(new fw.ui.document.DocumentId("asset", "Page:1374098083633"), "edit", {
 "view-type": "form"
});
Regardless of your specific usecase, I hope this blog reveals some insight into WCS UI menu customizations and saves you hours of research. Please, check back at http://www.function1.com/blog for future blogs on other interesting topics.
- Log in to post comments

Comments
Tanvesh Dwivedi on June 17, 2015
Search Implementation in sites
Jesty on June 19, 2015
Sites uses lucene for
Nirav Varma on February 28, 2016
Use case for modal window?
Jesty on March 01, 2016
Use case for modal window?
Nirav Varma on March 24, 2016
Re: Use case for modal window?