How to build custom attribute editors in WebCenter Sites 11.1.1.8

Starting with WebCenter Sites 11g BP1, Oracle had introduced various ways to customize the UI interface. Function1 has other blogs that talk about some of these techniques: Altering WebCenter Sites 11gR1 & Customizing Toolbar Buttons in Oracle WebCenter Sites. In this blog, I like to detail implementation steps to create a custom attribute editor. Attribute editors are used to customize asset forms. More details about attribute editors can be found in the official Oracle documentation: http://docs.oracle.com/cd/E29542_01/doc.1111/e29634/cust_form.htm.
What better way to explain a technical topic than with an actual example? Lets build an attribute editor. This attribute editor takes a regular expression (regex) as input and validates the appropriate attribute value on the asset form, output appropriate messages and disable/enable “save” function based on the regex result. For this example, I would be utilizing code provided in the Oracle documentation. Enhancements are highlighted in the following sections.
Elements and configuration files:
Following are the elements and configuration files that will need to be created or edited.
/cs/js/extensions/dijit/templates/regexValidation.html
/cs/js/extensions/dijit/regexValidation.js
/cs/js/extensions/themes/regexValidation.css
/Sites/11.1.1.8.0/presentationobject.dtd
/OpenMarket/Gator/AttributeTypes/REGEXFIELD.jsp
Implementation details:
WebCenter Sites UI is built using Dojo toolkit. Dojo is an open source JavaScript framework. WCS makes extensive use of Dojo's UI library called Dijit. Example in this bog will create and edit some Dojo/Dijit components. More information about the Dojo toolkit can be found at the official site http://dojotoolkit.org/
- Create an HTML template for the Dojo widget in the following location
/cs/js/extensions/dijit/templates/regexValidation.html
This template should include the following html.
<div>
  <div>
     <input type="text" dojoAttachPoint='inputNode' name='${name}' size='60'
       autocomplete="off" class='valueInputNode' ></input>
  </div>
</div>
This html will be displayed in the asset edit screen.
-
Create a Dojo widget in the following location.
/cs/js/extensions/dijit/regexValidation.js
The code for this widget can be found in Oracle documentation. It is suggested to copy the code and make necessary changes that are called out below. Update the file with the following code to load and set attributes for the dojo module.
dojo.provide('extensions.dijit.regexValidation');
dojo.require('dijit._Widget');
dojo.require('dijit._Templated');
dojo.declare('extensions.dijit.regexValidation', [dijit._Widget, dijit._Templated], {
  value: '',
  name: '',
  templateString: dojo.cache('extensions.dijit', 'templates/regexValidation.html'),
  baseClass: 'regexValidation',
Replace the “postCreate” function with the one included below. This code snippet includes logic to validate the attribute value against regex supplied through the attribute editor xml (This is explained in another section). Based on the validation results, the font color of the attribute is changed to show valid (blue) and invalid (red) entries. This function also, sets the “upcommand” attribute, to enable and disable form processing.
postCreate: function() {
      var self = this;
      dojo.require('dojo._base.json');
      var json = obj.elements['regexJsonVal'].value;
      var regexnode = dojo.fromJson(json);
      var regexVal = regexnode.regex;

        //use keyup for validation.
        dojo.connect(this.inputNode, 'keyup', function(e) {
            validateField(this);
        });
        function validateField(objVal){
        if (((regexVal).test(objVal.value) == false) && (objVal.value.length > 0))
         {
            dojo.style(objVal, "color", "#FF0000");
            obj.elements['upcommand'].value = "cancel";
        }
        else if (objVal.value.length == 0)
        {
            obj.elements['upcommand'].value = "submit";
        }
        else
        {
            dojo.style(objVal, "color", "#0000FF");
            obj.elements['upcommand'].value = "submit";
        }
    }
},-
Create a theme file in the following location.
/cs/js/extensions/themes/regexValidation.css
Include any required css here. In this example, following css is used.
.fw .regexValidation .valueInputNode {
    color: #0000FF;
}
-
Add the newly created attribute editor to “/Sites/11.1.1.8.0/presentationobject.dtd”
In this file, modify " <!ELEMENT PRESENTATIONOBJECT " tag.<!ELEMENT PRESENTATIONOBJECT (TEXTFIELD | TEXTAREA | PULLDOWN | RADIOBUTTONS | CHECKBOXES | PICKASSET | FIELDCOPIER | DATEPICKER | IMAGEPICKER |CKEDITOR | FCKEDITOR | IMAGEEDITOR | TYPEAHEAD | UPLOADER | REGEXFIELD| CUSTOMRADIOBUTTONS | COLORPICKER)>
Add the following tags to define the new attribute editor.
<!ELEMENT REGEXFIELD ANY>
<!ATTLIST REGEXFIELD REGEX CDATA #REQUIRED>
-
Create an attribute element for the new attribute editor in the following location. Ensure the name of this element matches the tag name defined in the “presentationobject.dtd” file above.
/OpenMarket/Gator/AttributeTypes/REGEXFIELD.jsp
The code for this widget can be found in the Oracle documentation. It is suggested to copy the code and make necessary changes that are called out below.
Include the dojo widget object and path to css file<script> dojo.require('extensions.dijit.regexValidation); </script> <link href="<%=ics.GetVar("cs_imagedir")%>/../js/extensions/themes/regexValidation.css" rel="stylesheet" type="text/css"/>Get regex value from the attributer editor xml.
args.setValString("NAME", ics.GetVar("PresInst"));
args.setValString("ATTRIBUTE", "REGEX");
args.setValString("VARNAME", "REGEX");
ics.runTag("presentation.getprimaryattributevalue", args);
String editorParams = "{ regex: " + ics.GetVar("REGEX") + " }";
Create a hidden input field, that contains the input regex. Value from this field is used in the dojo widget.
<input type="hidden" id="regexJsonVal" value='<%=editorParams%>' />
-
Create an attribute editor using the following xml.
<?XML VERSION="1.0"?>
<!DOCTYPE PRESENTATIONOBJECT >
<PRESENTATIONOBJECT NAME="REGEXFIELD">
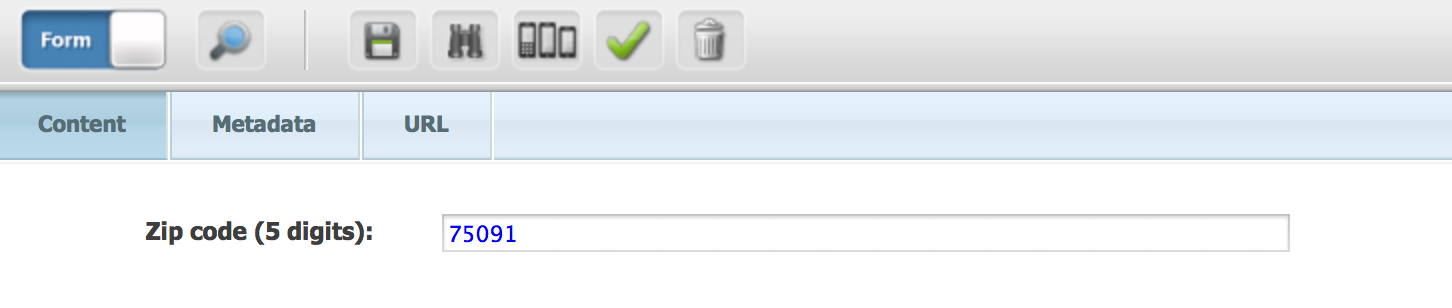
<REGEXFIELD REGEX="/^\d{5}$/"> </REGEXFIELD> </PRESENTATIONOBJECT>“REGEX” attribute holds the regex for validation. This example uses regex to validate zip code.
-
Now the attribute editor is ready to be used. Create an attribute and assign the newly created attribute editor to it.
Sample screen shots:
Valid input:
Invalid input:
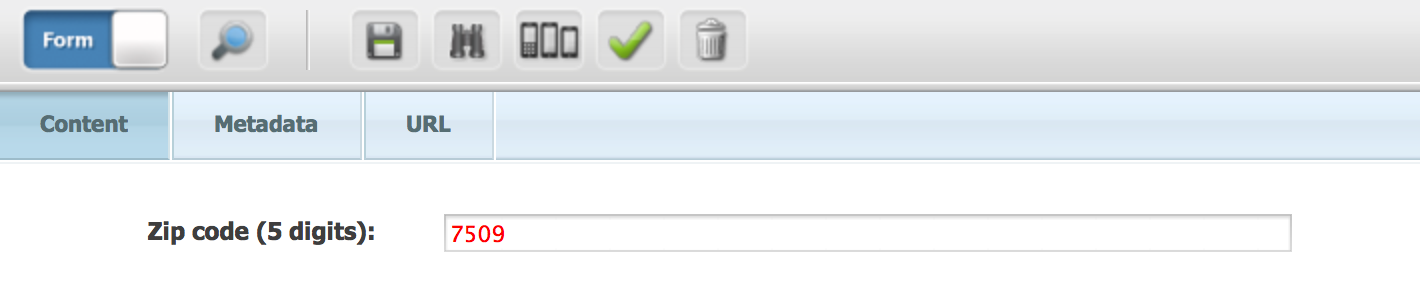
Saving with an invalid input, results in cancellation of form processing and a message.

- Log in to post comments

Comments
Sagar Ramachandran on April 28, 2016
query on configuring dojo toolkit
Jesty on April 28, 2016
query on configuring dojo toolkit