How to use Vanity URLs in the GSF with WebCenter Sites

WebCenter Sites does not support vanity URLs without customization. The GSF provides a great vanity URL package that is flexible and easy to use, and this post will describe how to set it up.
Background
First, a little background. Native URLs in WebCenter Sites all have to include a query string parameter called "pagename". If the page is rendering an asset, "c" and "cid" are also included, and recently, other parameters like "childpagename" have crept into the standard set of parameters that are found in URLs. This simply doesn't cut it anymore.
In Content Server 6.3, I added support for the URL Assembler, which gave developers the ability to control how a list of query string parameters were converted into a URL string, and back again.
<render:parameter name="var1" value="abc" />
<render:parameter name="var2" value="def" />
<render:parameter name="var3" value="ghi" />
vs
/mypage/abc/def/ghi
This was a huge boost to creating prettier URLs. It made it easy to get rid of the query string, but it didn't really go far enough. To create a pretty URL, you really need to be able to look up some asset data. For example, it's common to create a field in an asset that holds all or part of the desired URL for the asset. This should be easy, because in the URL assembler we have access to the asset id.
The problem is that the URL Assemblers have to run on Remote Satellite Server, which means no database access. Without being able to look up asset data in the Assembler, we have to read this information in another spot, and that spot must be no later than the template that runs the <render:satellitepage> or <satellite:link> tags.
Old and Busted: The Link Template Pattern
Adding these asset data reads in the templates very quickly led to the advent of the Link template pattern, which is widely used in FirstSite II. In this pattern, a template called Link is created and is called with only c and cid as parameters. The template then performs whatever crazy logic that must be performed, and it almost always ends with a call in to <render:gettemplateurl> with the appropriate parameters that the URL Assembler needs to know in order to generate a pretty URL.
This technique goes pretty far toward creating pretty URLs, but decoding them was a problem. It was possible to create some sort of web server rewrite rule that injected pagename back into URLs so that Content Server could at least read it, but the assembler does not know what to do with the vanity URL in order to get c and cid back. To do this, another template has to be run to search for the asset matching the pretty string, ultimately figuring out c and cid. This job fell to the Wrapper CSElement/SiteEntry pair.
Pretty soon wrappers started to get very long and complex. Some optimizations worked their way in, and this logic migrated into java classes. At least by putting the logic into java classes helped, because it ensured that the lookups in the Link templates were paired with the de-reference done in the wrapper. This symmetry reduced bugs.
This approach led to the development of the ItemContext assembler. It used an algorithm to derive the pretty URL based on the placement of an "item" (usually a page, or an article-like asset) in a "context" (for example, the location in the Site Plan Tree, or the location in a product catalog). This was a clean, extensible approach, and applied to a large number of pages. It supported both programmatic and explicit specification of URLs.
There are several major drawbacks with this approach. For one, the need for Link templates made it impossible to to create pretty URLs using the "add link" functionality in FCKEditor/CKEditor, because an embedded template is required to do the database lookups. The other major drawback is the added complexity of the link template in general, the added logic to do the database lookups, and the verbose addition of tags to the <render:gettemplateurl> tag.
IReference and PageRef
It turns out that the missing capability has been present in the product since the rewrite of export publishing Julie and I did for Content Server version 4: IReference. The COM.FutureTense.Interfaces.IReference interface, which was retrofitted to extend Definition in v6.3, represents the raw data generated by the link generating tags <render:gettemplateurl> and <satellite:link>. Whenever you create a link to another page in Content Server, all of the parameters used by those tags are captured by an IReference object. This method
public void setParameters(Map args, ICS ics) throws ReferenceException
gives us access to all of the functionality of ICS while the arguments are being set into the IReference object. While c and cid are being set, we can process this information and add derived parameters, much like how a flex filter can process incoming information into an asset just before the asset is saved.
The implementation of IReference used by the <render:gettemplateurl> tag is even configured in a property file (futuretense_xcel.ini's xcelerate.pageref property), so all that we would have to do would be to extend the base implementation, re-set the property, and we would be finished!
The problem was that this extension point was "for internal use only" up until Content Server 7.5.4. Once the FatWire GST convinced product management that this interface was safe to extend and could be public, pure Vanity URL support was in reach. In fact, the publication of this extension point alone was the catalyst for the first formal release of the GST Site Foundation in 2010.
The Controller
The last part missing was the resolution of the pretty URL string in the wrapper. WebCenter Sites to this day does not have formal support for controllers, but a clean workaround does exist. By creating a CSElement/SiteEntry pair using the legacy XML scripting language, and adding a single <CALLJAVA> tag to it, a custom Java class can be executed that performs arbitrary logic. A controller infrastructure can be built in this framework, and this is exactly what was done.
Into this controller, we simply add the ID-resolving logic that complements the PageRef extension, and the URL lookup and resolution issue is solved.
It is using this approach that the core pieces of the URL assembler were put together.
The remainder of this blog will describe how to work with and configure vanity URL that comes with the GSF.
Feature Overview
The GSF controller is designed to give users complete control over the content of the URL, even including the domain. Business users can enter the complete URL and it will be the primary formal URL for the page.
This vanity URL support also seamlessly switching the URLs between environments, thereby supporting vanity URLs across the development instance, management instance, and delivery instances.
Vanity URLs enforce SEO best practices by enforcing "one URL per page" rules, while allowing any text the business user can dream up into the actual URL. If you are looking for a URL assembler that supports multiple hostnames per URL (on a given environment), then this solution is not for you (though it can be with some simple modifications).
Setup Instructions
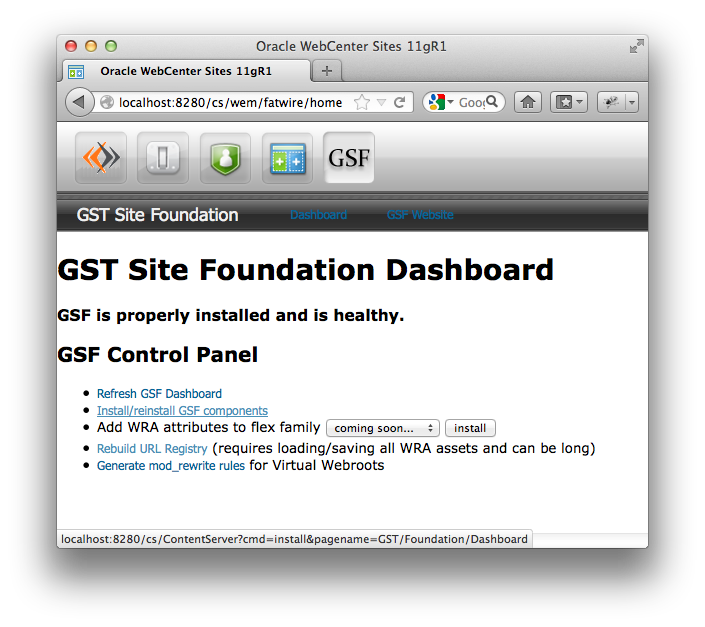
Install the GSF
The first step is to install the GSF using the standard installation instructions. David Chesebro's blog on the topic is a great starting point.
Identify your environment
Each environment needs to be named to work with GSF Vanity URL support. Good names for the environments would be things like "dev", "production management", "qa", "production delivery", etc.
The GSF URL assembler will match this environment name to the environment name set in your GSTVirtualWebroot asset so that it can swap out the URL base depending on which system you're working with.
To set the environment, add a system property called com.fatwire.gst.foundation.env-name and set it to the name of the environment you want to use. For example, you might want to add the following line to your application server start script's Java command line:
-Dcom.fatwire.gst.foundation.env-name=dev
Create your Virtual Webroots
The next step is to create an instance of your GSTVirtualWebroot assets that set your environment name to what you configured, and let you tell the GSF how you want your production URL to be changed when it's viewed on your local environment.
Suppose we have the following URL:
http://www.mycompany.com/catalog/search
and we want to view it on production and dev environments. On dev, we would want the url to be:
http://dev.mycompany.com/catalog/search
We would add the asset with the following fields:
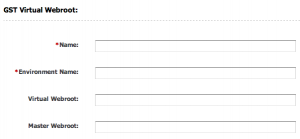
The name field is just used in the Sites UI. Set it to whatever you want. The Environment Name field corresponds to the env-name parameter set above. The Virtual Webroot corresponds to the url prefix that you want to appear on your current environment - in this case, we would set it to
http://dev.mycompany.com/catalog
The Master Webroot is the webroot as you would like it to appear on your delivery server, so
http://www.mycompany.com/catalog
Actually this is more of a guideline than a hard and fast rule. The strict rule is that the master webroot has to be set to what you use in the URLs in your assets. It's just easier to keep things straight if you set the master webroot to the one you want to use for your delivery system.
Create Virtual Webroots for each URL prefix you have on your site. For example,
http://www.mycompany.com/catalog
http://www.mycompany.com/company
http://www.mycompany.com
http://blog.mycompany.com
Note, that you can actually set virtual webroots in the root directory of the website, but there are some slight performance considerations when doing this. As we'll see below, virtual webroots get converted into URL rewrite rules. If you can be specific, and define just a few url prefixes, the rewrite rules will have less work to do before finding a match, which will reduce load on your webserver. However, if you do want to use just the hostname, you'll have to manually add a few of your own rewrite rules, so disable rewriting for some known URLs. In other words, instead of rewriting specific prefixes so that they are passed to Sites, you rewrite the root so that everything goes to Sites, and specify exceptions instead, like /cs*, /images, /css, etc.
Deploy the Rewrite Rules
Once the environment is configured and the virtual webroots are set up, vanity URLs will be generated by Sites. To make sure that links actually work though, rewrite rules have to be added to the webserver.
Each virtual webroot asset can be converted into a rewrite rule. The rules' job is to match URLs that look like the virtual webroot for your environemnt, then rewrite it to redirect traffic to Sites by changing the path to /cs/Satellite?pagename=GST/Dispatcher (or whatever override for this that you may have configured). For instance, our search URL above would be rewritten as
http://dev.mycompany.com/cs/Satellite?pagename=GST/Dispatcher&virtual-webroot=http:/dev.mycompany.com/company&url-path=/search
The controller takes over from there, looking up the asset type and asset id of the asset that matches the virtual-webroot and url-path specified for the current environment.
You can devise your own rewrite rules, and if you want to set up the root of the website as discussed above you will have to. However, if you're using the Apache web server, you can simply run the rewrite rule generator in the GSF WEM app.
Clicking on the Generate mod_rewrite rules link produces a complete set of rewrite rules for all of your environments:
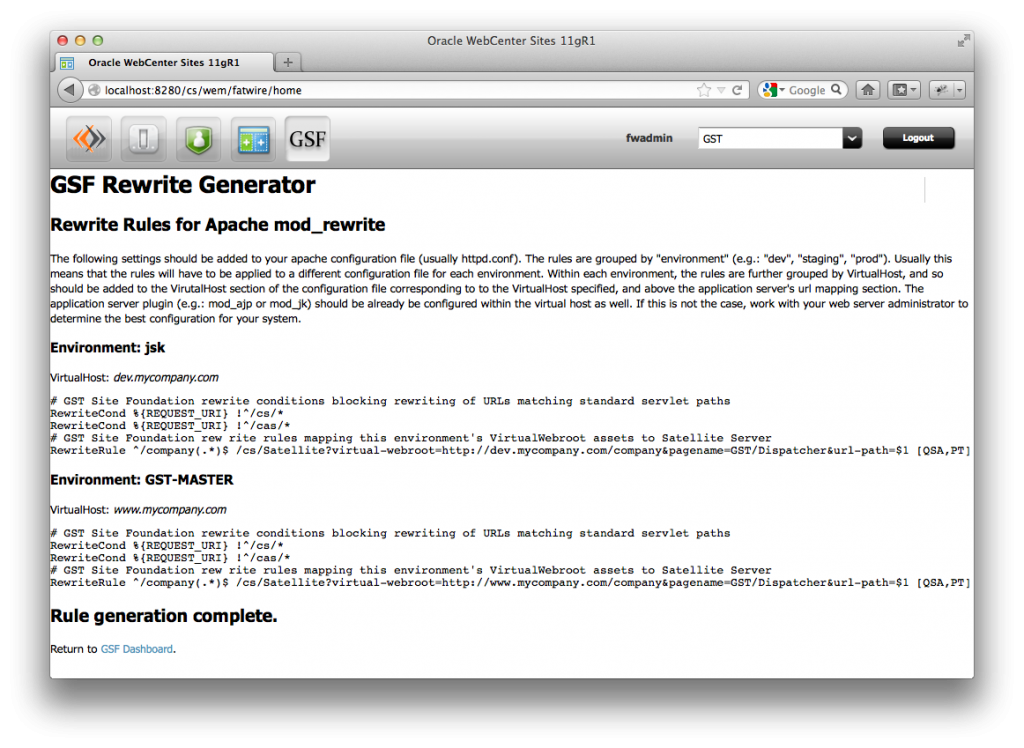
As indicated in the instructions with the generated URLs, simply add the rewrite rules to the appropriate virtual host for your environment. Restart the webserver, and the vanity URL system installation and configuration is complete.
Start Defining Vanity URLs
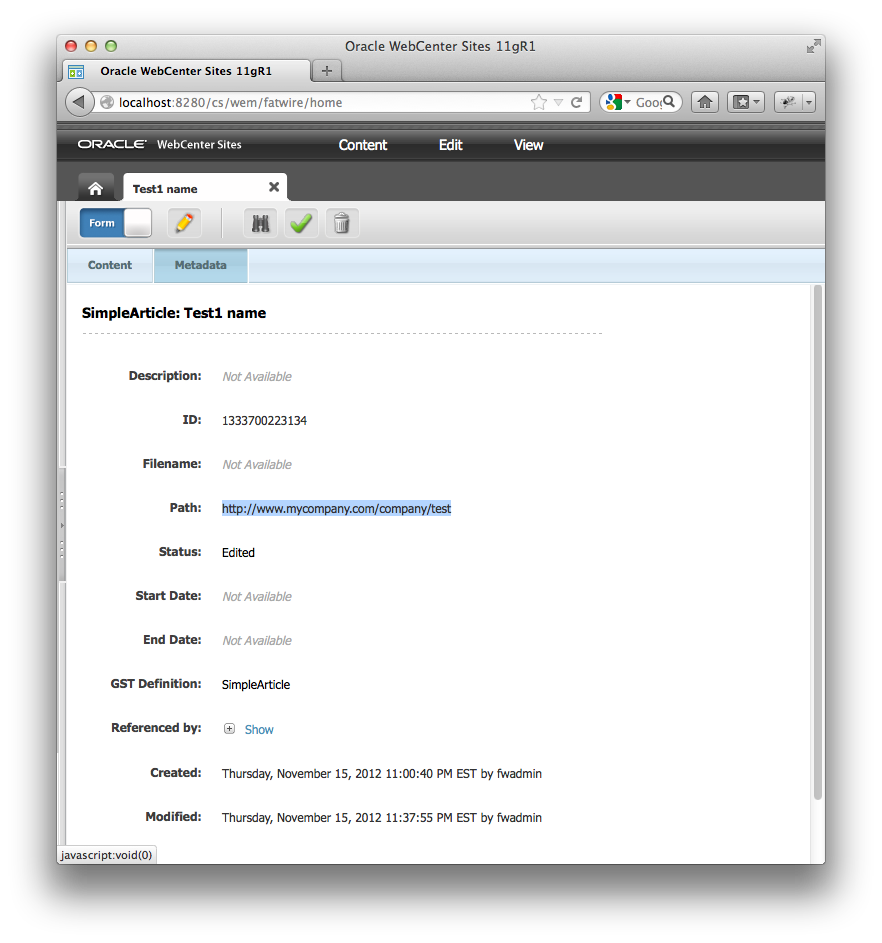
You are now ready to start using vanity URL support from the GSF. To use it, simply enter the entire vanity URL you would like to use into the path field of your asset. As long as the URL begins with the URL corresponding to one of the valid Master Webroots you defined in yoru Virtual Webroots, you are all set.
A Note about Preview
When rendermode is set to preview, vanity URL generation is turned off. Vanity URLs will be resolved, but Sites will not automatically genearte them. Your site may still do so, but don't be surprised if everything looks fine from a setup point of view but the URLs still appear with the query string. Simply delete the rendermode parameter(s) and reload the URL (you may want to do this in another browser).
Publishing Vanity URLs
The vanity URL infrastructure described above works fine for the first environment, but how do we add vanity URL support for downstream environments? Simply create new GSTVirtualWebroot assets corresponding to the new environments' Environment Name, and publish (or deploy) them to your downstream systems. Re-run the rewrite generator and add the rules for the new environment to the webserver for that environment. That's all there is to it.
Yes, you will have a few extra Virtual Webroot assets floating around on your system that aren't used by the environment, but having everything managed in one spot makes things quite easy to track.
Installation Summary
Working with vanity URLs in the GSF is easy if you follow the steps above. Here they are again as a reminder:
- Install the GSF
- Identify your environment
- Create your Virtual Webroots
- Deploy the rewrite rules
- Start defining Vanity URLs
If you have any questions about working with Vanity URLs and the GSF that aren't addressed here, please feel free to email me, or leave a comment below. Happy URL writing!
- Log in to post comments

Comments
Nikhil on June 13, 2013
Simon Shipman on January 03, 2013
Tony on January 19, 2013
Sreekanth on June 25, 2013
Tony on July 21, 2013
Tony on July 21, 2013
Tony on March 12, 2013