Introduction to Drupal 7 Maps - Leaflet
This is my second post in the Drupal mapping series. Introducing Leaflet!
In my previous post I described the steps to create a map in Drupal using OpenLayers. Since that post was published the OpenLayers Drupal module has been completely rewritten. The current stable 3.x release is beta3. While this is a stable release, the module is still under heavy development. This gave me the perfect opportunity to explore another mapping solution, one that I’ve been wanting to test drive for some time, Leaflet.
I’m happy to report that the experience has been a pleasant one. The Leaflet Drupal module provides the fastest route to a functional, node driven map in Drupal that I’ve seen to date.
Required Modules
The Leaflet module only has three required modules:
In order to use Leaflet Views, the submodule that provides integration with Views, you will also need to install Geofield and of course Views.
The addition of two optional modules will make populating your Leaflet maps a breeze:
Required Libraries
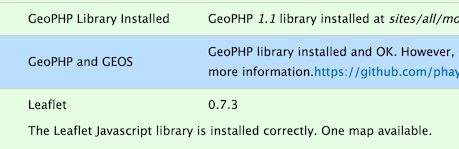
You will need to add the Leaflet JavaScript library to your libraries as well. Download the latest release of Leaflet and rename the folder to leaflet when you add it to your sites/all/libraries folder.
GeoPHP is required to enable Geofield but you don’t need to download any extra JavaScript. All the integration you need is provided when you install the module.
Go ahead and check your sites status report at admin/reports/status to ensure that your libraries are installed correctly.
Map Components
Now that you have all of the necessary modules in place, you can go ahead and create a Content Type to hold some geospatial data. Go ahead and create a new content type or add the following to an existing type that you want to modify.
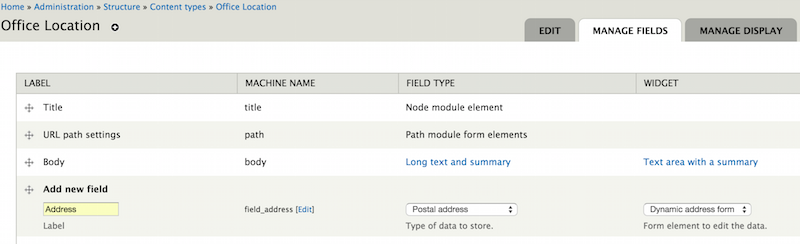
Let’s start by adding an Address field. This will let you avoid having to look up geospatial coordinates yourself, instead relying on other modules to automatically fill in that information for you. As you can see below, I just added a new field, Address, setting the field type to Postal address and the widget to Dynamic address form. For this example I left the field settings at their default values.
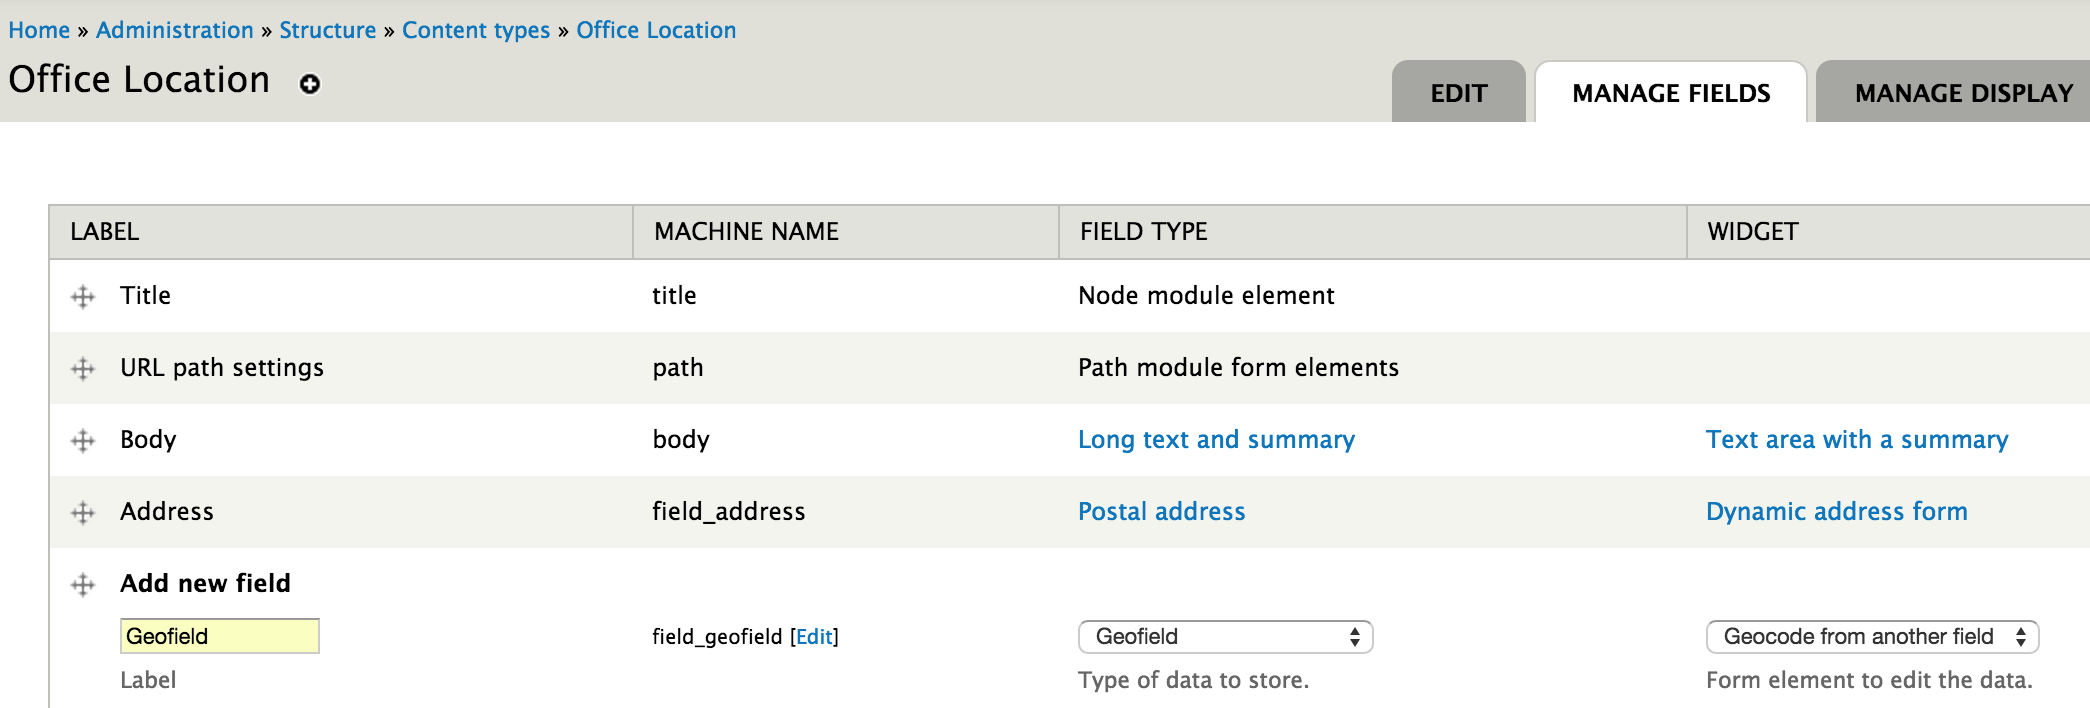
Next you will add a new field of the type Geofield. Set the widget to Geocode from another field. If you didn’t want to use automatic conversion of addresses to geospatial information, you would skip the address field entirely and set the geofield to the type of geo information you wanted to manually enter such as Lat/Long, WKT, GeoJSON or Bounds.
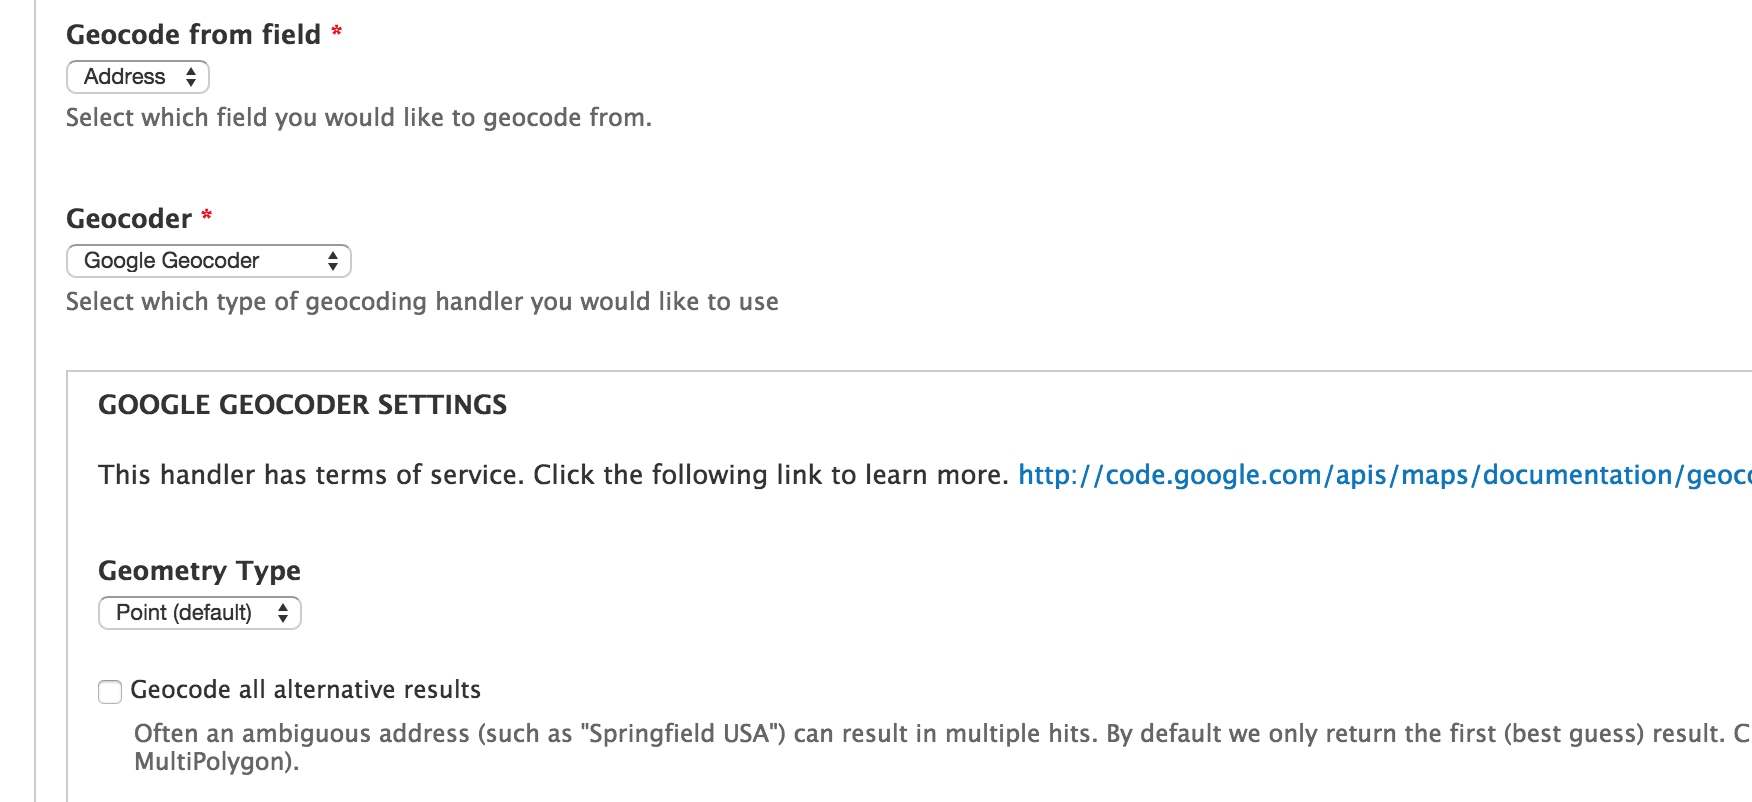
For the Geofield settings, leave the storage as Default. Set the Geofield from field to the Address field that you created previously and then choose the Geocoder service that you want to use. Google Geocoder is fine for our purposes. Just be aware that there are limits to the free version of the Google Geocoding API. The limits are generous enough to handle casual map usage though, allowing 2500 requests a day and 5 requests a second.
You can leave the other settings at their default values as well but do read through the options to get a glimpse of some of the other cool things you can do with Geofield.
Go ahead and create a new instance of your content type. A title and address is all you’ll need to get started. Click save and you can instantly see how the geofield is populated.
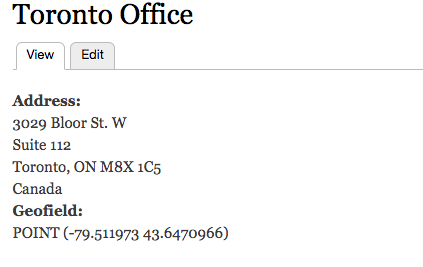
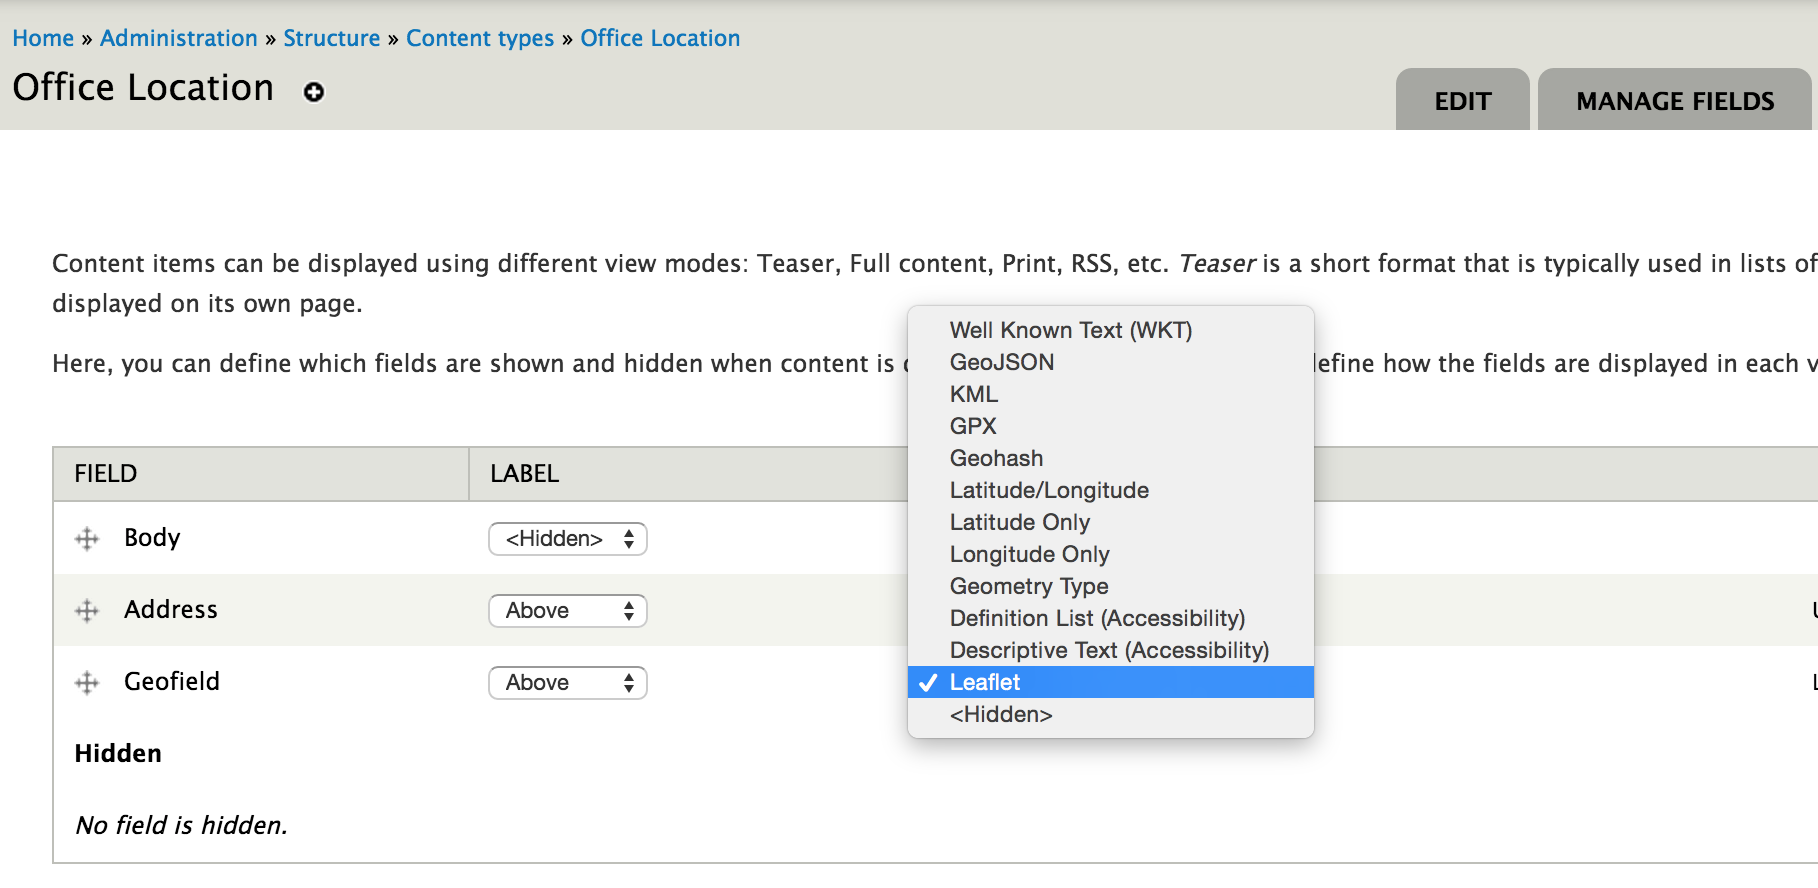
You have a couple of options to display this information on a Leaflet map. The simplest is using the content type display. Simply navigate to admin/structure/types/manage/office-location/display and change the format of your geofield to leaflet instead of WKT.
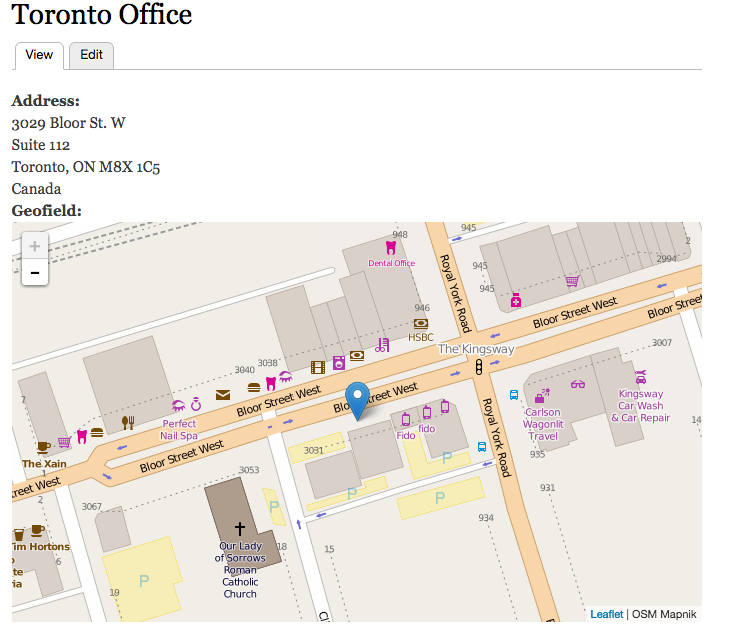
Your map will look rather plain at this point.

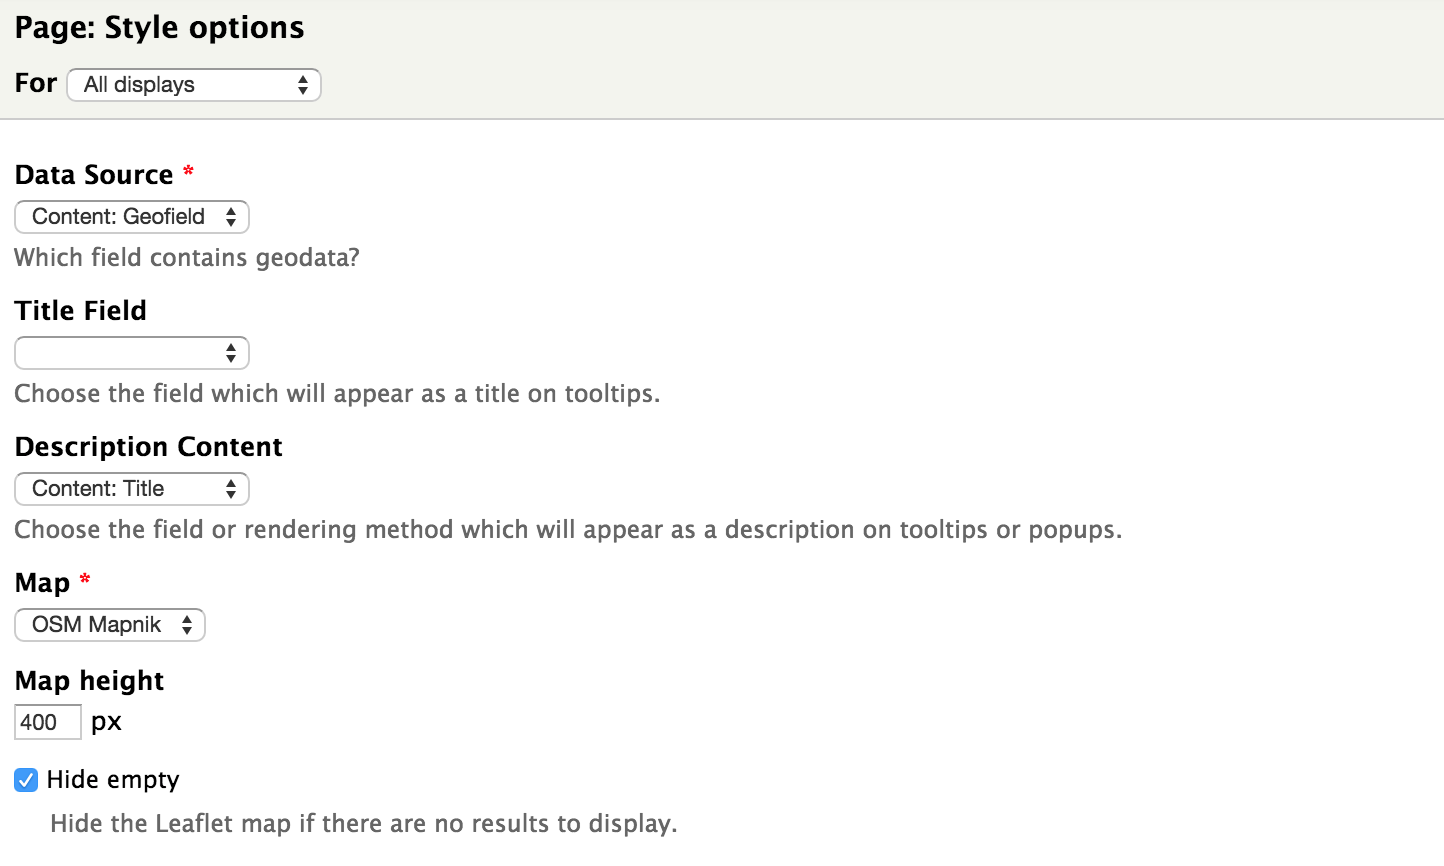
You need to edit the format settings of your geofield in order to display a background. Select the Leaflet map type that you want to use to display this field. Without the More Maps module, you only have one option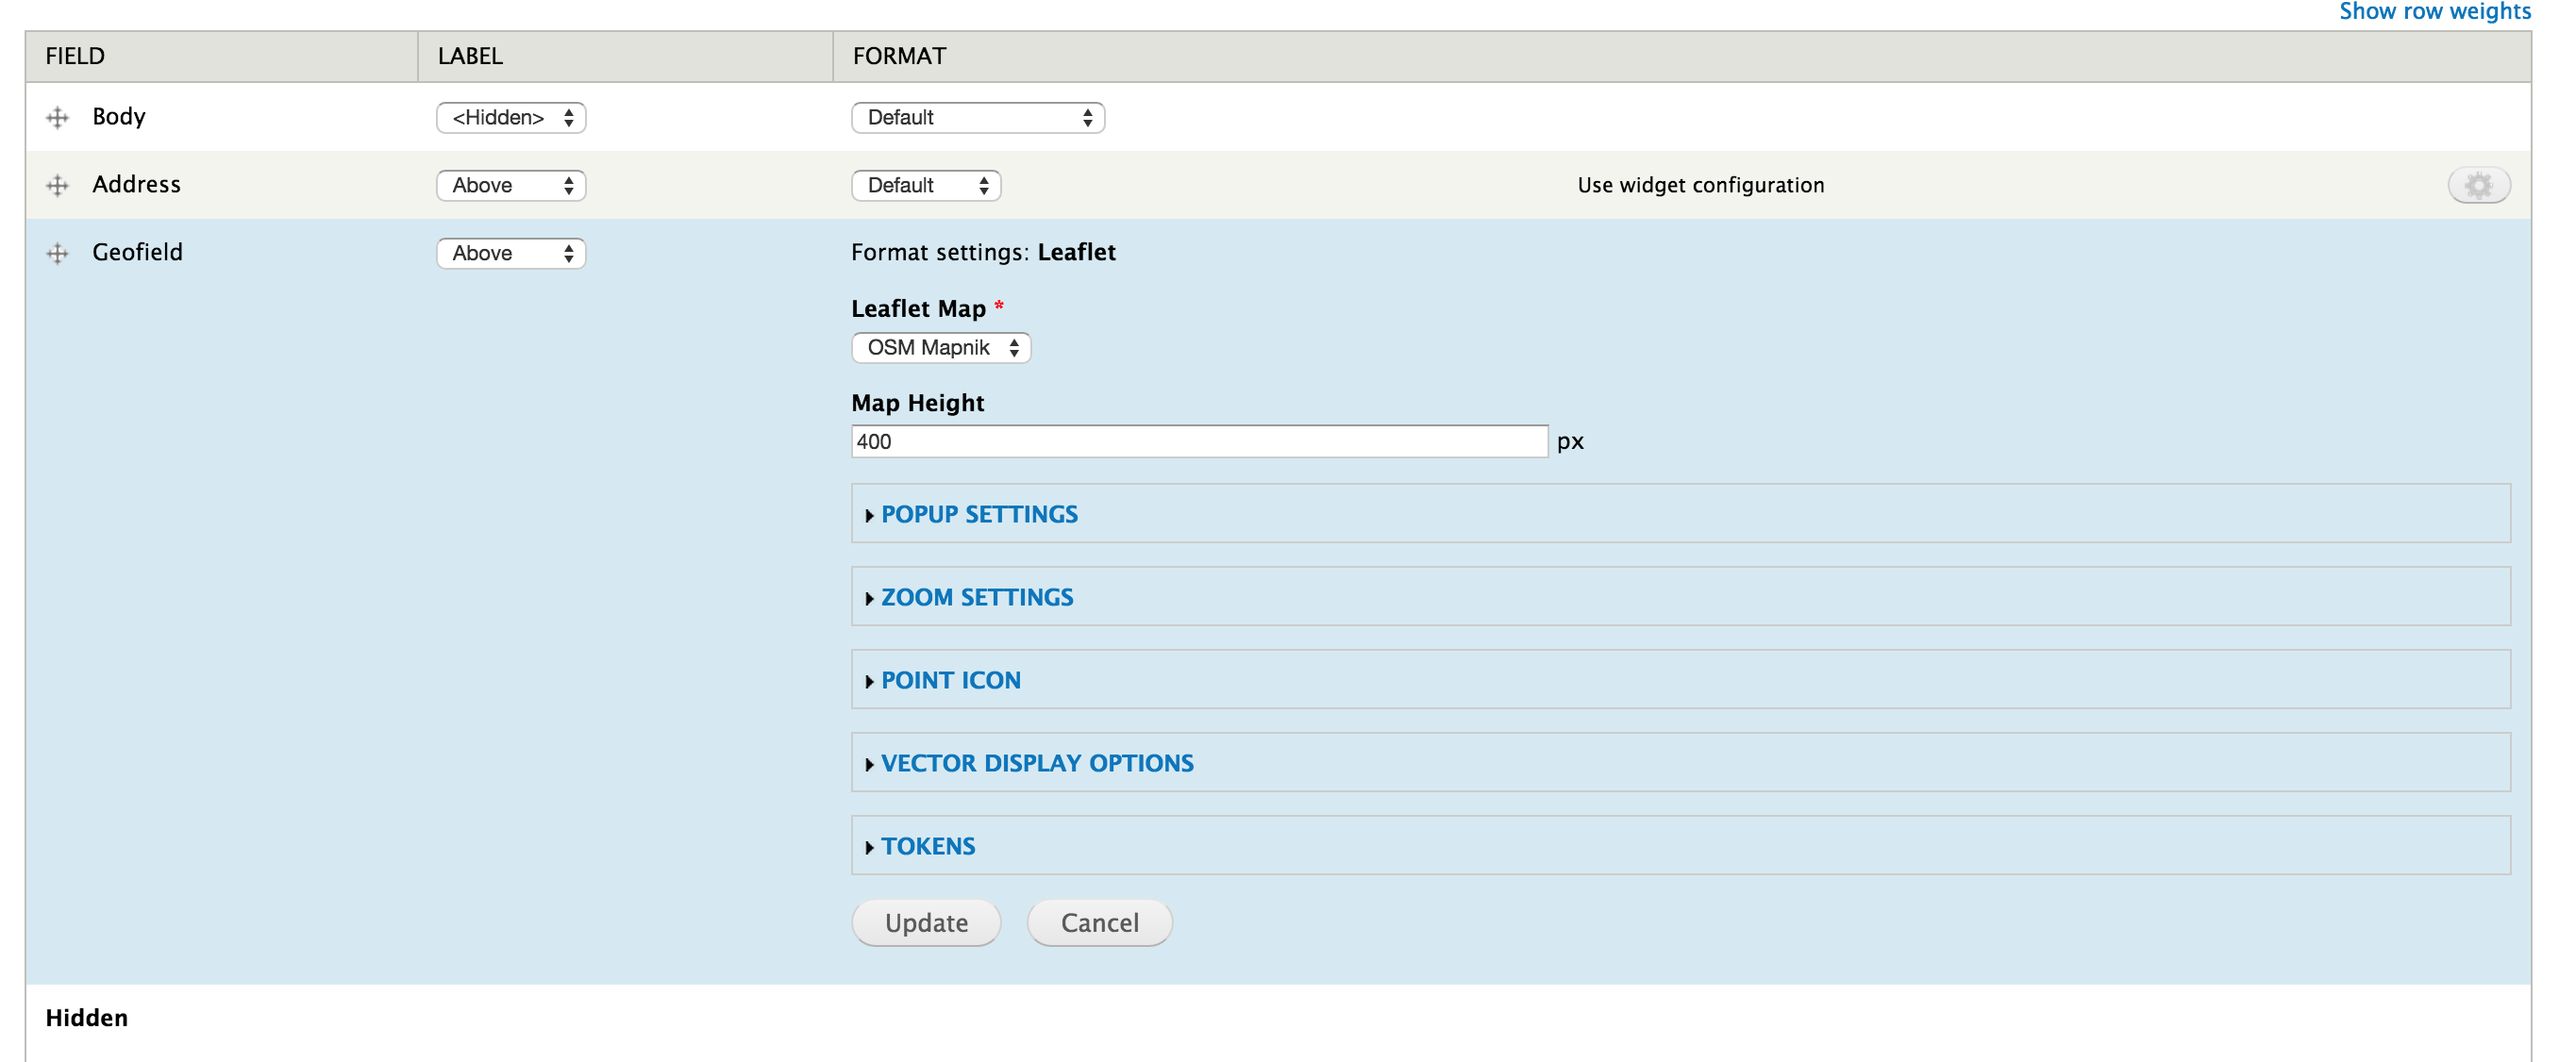
There are a few other handy settings here as well, including the zoom levels, popup customizations, etc. Update the format settings and refresh your office page to see a functioning Leaflet map!
You could have multiple addresses on a single node and map them all to a multipoint geofield but in real life you are much more likely to want to display data from a variety of nodes. That’s where views integration comes in.
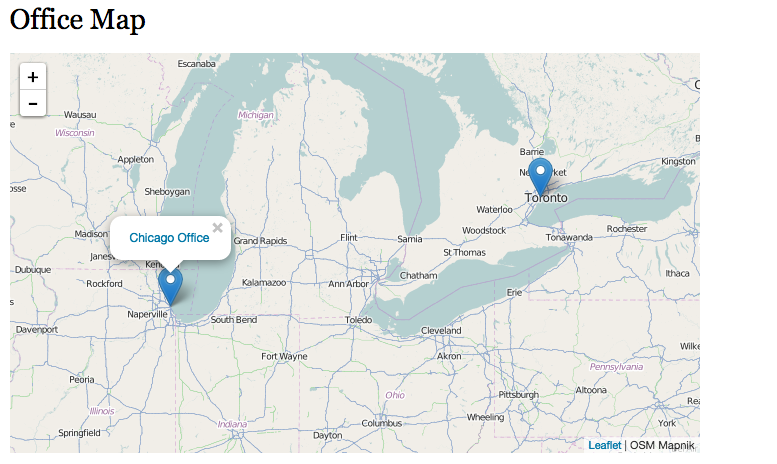
I created a second office location in Sydney Australia. Let’s see what we have to do to get both of these locations on a single map.
Create a new view of Office Locations with a display format of Leaflet Map.
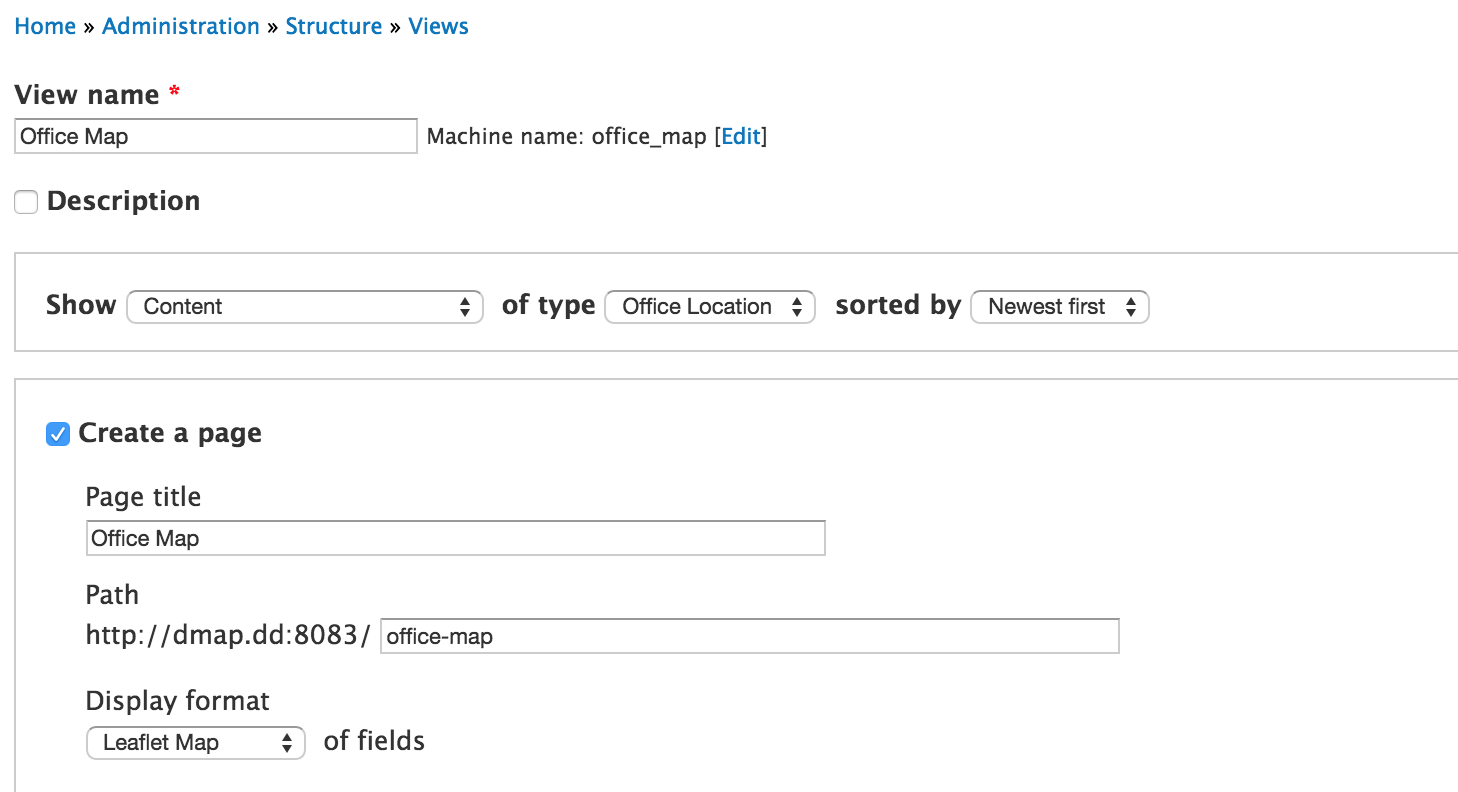
Add in your content types geofield. Then edit the format settings to set the Data Source to geofield and the Description content to title.
And that’s it! Hit save and check out your new Leaflet map with two locations. Click one of the markers to see the title linked to the original content.
Reviewing my last post where we looked at mapping using OpenLayers, it’s clear to see that Leaflet provides a much faster route to a functional map on your Drupal site. But we’ve hardly scratched the surface of the options available or the effort required to customize your maps. My next post in this series will investigate which mapping module best lends itself to certain types of modification.
- Log in to post comments
