Installing WebCenter Sites 11gR1 on Windows
So you're a PC and not a mac (or a line-ux either for that matter) and somehow you find yourself yearning to test drive and/or develop on the latest release of Fatwire Content Server...eh hem...I mean't Oracle WebCenter Sites? Well then you've come to the right place. I will walk you through some of the idiosyncrasies of getting a local WCS 11gR1 instance up using and running on a machine running Windows 7.
Caveat Emptor: The 12 steps outlined below may lead you to another type of 12 steps...just sayin'
Step 1: Download and install the latest version of JDK
The product has been certified on JDK 1.6 so make to sure to grab and install the latest version located here.
Step 2: Install Tomcat 6.0.x
This usually means grabbing the right zip file and extracting it to somewhere you're happy with (i.e. C:\WCS11gR1\tomcat). You can find the zip file here.
Step 3: Install hsqldb and configure it for use with WebCenter Sites
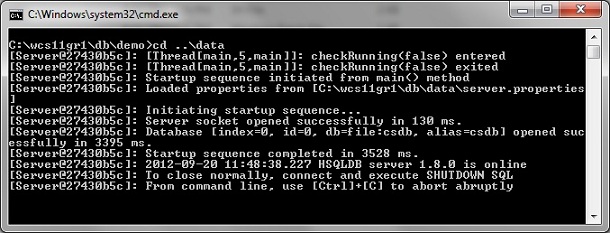
As in Step 2, you just need to grab the zip file and extract it to a place on your filesystem (i.e. C:\WCS11gR1\db). You can find the zip file here. The easiest way to configure hsqldb for use with WCS is to navigate to C:\WCS11gR1\db\demo and edit the batch file called runServer.bat. Replace the contents of runServer.bat with the following and save.
cd ..data
@java -classpath ../lib/hsqldb.jar org.hsqldb.Server -database.0 file:csdb -dbname.0 csdb
Double clicking the batch file will startup your instance of hqsqldb as seen below.
Step 4: Install the hsldb database driver
Copy the file C:\WCS11gR1\db\libhsqldb.jar to C:\WCS11gR1\tomcat\lib
Step 5: Create some additional directories you'll need
create C:\WCS11gR1\home, C:\WCS11gR1\shared and C:\WCS11gR1\installer. You'll need them to house the installer itself and the home and shared directory will house the installed product
Step 6: Set up Java, Classpaths and JVM settings
Before you can download and run the WCS Installer you will need to ensure the following environment variables have been setup properly.
First is JAVA_HOME, make sure you have set a windows environment variable of the same name to point to the install directory of your JDK (i.e. C:\Program Files\Java\jdk1.6.0_33).
Second you will need to add the following near the beginning of the file C:\WCS11gR1\tomcat\bin\catalina.bat (right after the variable description section will suffice) .
SET JAVA_OPTS=-Xmx1500m
SET CS_HOME=C:WCS11gR1home
SET CATALINA_OPTS=-XX:MaxPermSize=192m -Dfile.encoding=UTF-8 -Dnet.sf.ehcache.enableShutdownHook=true -Djava.net.preferIPv4Stack=true
Also make sure you have the following line in catalina.bat where it will be picked up. It will add a few exta items to your classpath.
set CLASSPATH=%CS_HOME%\bin;%JAVA_HOME%\libtools.jar;%CLASSPATH%
Step 7: Add a datasource for Tomcat to use to access your hsqldb instance
Add the following to C:\WCS11gR1\tomcat\conf\server.xml just above the </Host> tag and save:
<Context path="/cs" docBase="cs" reloadable="true" crossContext="true">
<Resource name="csDataSource" auth="Container" type="javax.sql.DataSource"
maxActive="50" maxIdle="10"
username="sa" password=""
driverClassName="org.hsqldb.jdbcDriver"
url="jdbc:hsqldb:hsql://localhost/csdb" />
</Context>
<Context path="/cas" docBase="cas" reloadable="true" crossContext="true">
<Resource name="csDataSource" auth="Container" type="javax.sql.DataSource"
maxActive="50" maxIdle="10"
username="sa" password=""
driverClassName="org.hsqldb.jdbcDriver"
url="jdbc:hsqldb:hsql://localhost/csdb" />
</Context>
Step 8: Start tomcat by double clicking on C:\WCS11gR1\tomcat\bin\startup.bat
Step 9: Download the installer
You can download the 11gR1 installer on the Oracle Technology Network located here. I cannot guarantee that once you sign up and download the installer that you won't be contacted by an Oracle sales person (your on your own there!) Extract the file in a temporary location. There will be an additional zip file within the main file downloaded. Locate WCS_Sites_11.1.1.6.0.zip and copy it to C:\WCS11gR1\installer and extract it there. This will significantly shorten the file paths and save you from errors with file paths that are too long (yup it happened to me, trust me)
Step 10: Edit cscore.xml so that you will have an hsqldb option during the attended install
Within the installer folder do a search for cscore.xml and edit the file. You will be un-commenting the commented entries for HSQLDB as follows:
Un-comment the following 2 types of entries:
1. <!--COMBOBOXENTRY TEXT="HSQL Database Engine" HASHVALUE="HSQLDB"></COMBOBOXENTRY-->
2. <!--COMBOBOXENTRY TEXT="HSQL Database Engine" HASHVALUE="HSQLDB"/-->
Step 11: Work through the installer
Make sure for the Sites URL Parameters you enter localhost for the IP and 8080 for the port understanding that tomcat is using port 80.
Installation Directory : C:/WCS11gR1/home
Installation Type : Single server
Shared Folder Path : C:/WCS11gR1/shared
Host Name : localhost
Port Number : 8080
Platform Type : APPSERVER
Application Server : Tomcat 6.0.32+/7.0.23+
Server Path : C:/WCS11gR1/tomcat
Database : HSQL Database Engine
JNDI Data Source Name : csDataSource
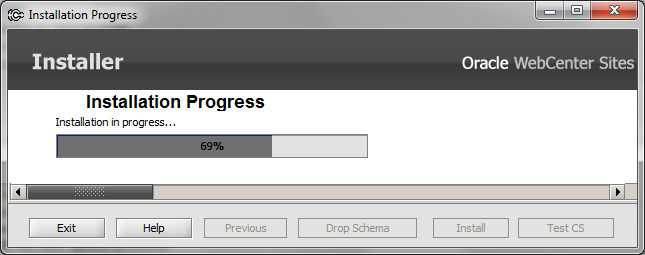
If all goes well after clicking install you will be prompted with the following screen:

Step 12: Edit some cache files and restart Tomcat
Now open all 4 "-cache.xml" files located at C:\WCS11gR1\tomcat\webapps\cs\WEB-INF\classes and edit them as follows:
Make sure the multicastGroupAddress ips are unique to each and that timeToLive=1
<cacheManagerPeerProviderFactory properties="peerDiscovery=automatic, multicastGroupAddress=230.0.0.0, multicastGroupPort=4666, timeToLive=1" />
You can use 230.0.0.0, 230.0.0.1, 230.0.0.2, and 230.0.0.3 (one in each of the files).
Now you should have a unique entry for cacheManagerPeerProviderFactory in each of the 4 files.
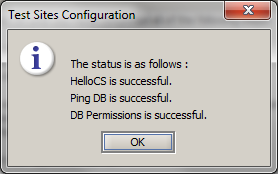
Now you can restart Tomcat. Once it's restarted go back to the installer and click Test. You should see the following and then proceed to cry tears of joy because you should be very very close now!
Go ahead and click OK and then continue on with the installer. It should now run to completion.
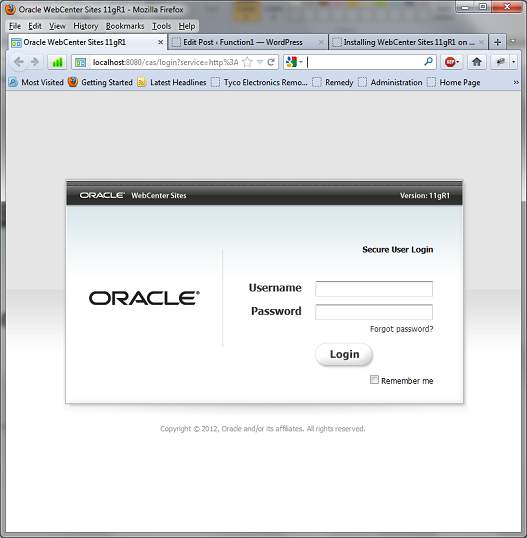
The last thing to do is open a browser and navigate to http://localhost:8080/cs. If you see the screen as depicted below in your browser then well...you're done!
...you're welcome!
-Mitul
- Log in to post comments

Comments
Raed on September 21, 2012
Mitul on November 20, 2012
Kazi on November 20, 2012
Kazi on November 21, 2012
Pallavi on December 28, 2012
Nirav on June 10, 2013
Kazi on November 21, 2012
Madhur on February 12, 2013
Mitul on February 12, 2013