Setting up a Simple Workflow in Oracle WebCenter Sites

Welcome fellow enthusiasts of Oracle WebCenter Sites, to an introductory blog about how to set up a simple workflow! As we all know, workflow is an integral aspect of any web content management system, and thus creating an efficient workflow is paramount to the overall success of the system and it’s business owners.
The particular workflow we will design is modest yet effective.
There are 2 main Roles of users:
- ContentAuthor – creates/edits content
- ContentApprover – approves content for publishing
Go ahead and create these 2 Roles, and also make sure to have users created with these Roles and the appropriate ACLs!
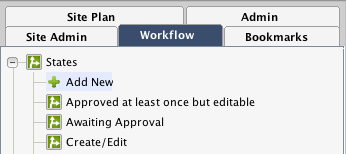
There will be 3 States in the workflow:
- Create/Edit
- Awaiting Approval
- Approved at least once but editable
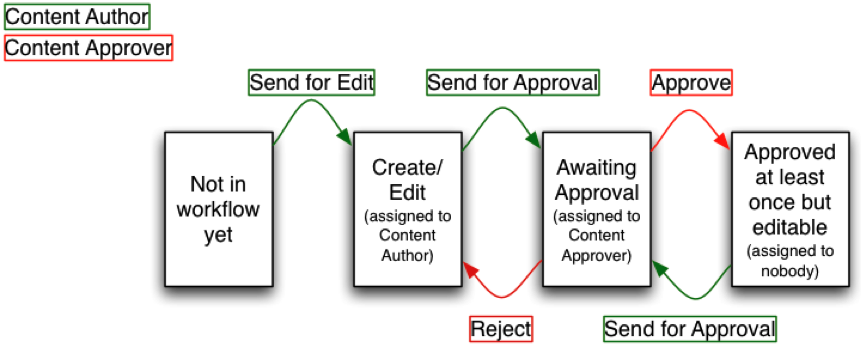
There will be 5 types of Steps:
| Step | From State | To State | Allowed User Role |
| Send for Edit | Not in workflow yet | Create/Edit | Content Author |
| Send for Approval 1 | Create/Edit | Awaiting Approval | Content Author |
| Approve | Awaiting Approval | Approved at least once but editable | Content Approver |
| Reject | Awaiting Approval | Create/Edit | Content Approver |
| Send for Approval 2 | Approved at least once but editable | Awaiting Approval | Content Author |
We will utilize Start Menu items configured with our Workflow Process so that when a Content Author creates a new content item, the asset ends up in the “Create/Edit” state, and is assigned to the Content Author. Once the Content Author is finished with the edits, he/she sends the workflow task for approval to a Content Approver. The Content Approver can then either approve or reject the asset. If it’s approved, the asset is moved to the “Approved at least once but editable” state, which is functionally equivalent to “Create/Edit” except that the asset is now also publishable. If the Content Approver rejects the asset, it is sent back to the Content Author in the “Create/Edit” state.
Here is a nifty diagram that visually summarizes all the above info:
So now that all the planning is done, let’s get started with implementation!
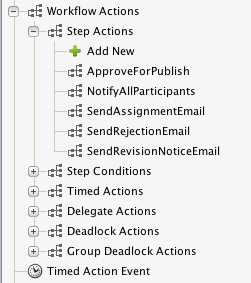
We can use a few out-of-the-box Step Actions and Email Objects to help facilitate some of the details of implementation.
Step Actions
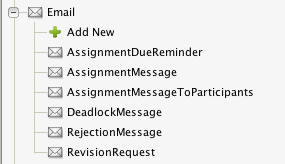
Email Objects
We will utilize the following 3 default Step Actions:
- ApproveForPublish
- SendAssignmentEmail (which uses default Email Object “AssignmentMessage”)
- SendRejectionEmail (which uses default Email Object “RejectionMessage”)
So now that we have our Roles, users, Workflow States, Step Actions, and Email Objects created, we can jump into creating the actual Workflow Process. The Workflow Process consists of 2 main aspects: the Workflow Steps and the Function Privileges. We’ll get to the Workflow Steps soon enough, and the Function Privileges a little later.
First, go ahead and “Add New” Process under the Workflow tab.
In the following screen, choose a Process Name and a Description. Choose the Site you want to apply the workflow to. For Asset Type, let’s keep it simple and pick “Any”. For Roles, make sure you choose the 2 new Roles we created, ContentAuthor and ContentApprover. For Administration Roles, choosing WorkflowAdmin should suffice. Let’s choose “allowed” for Process Deadline in case we need it in the future.
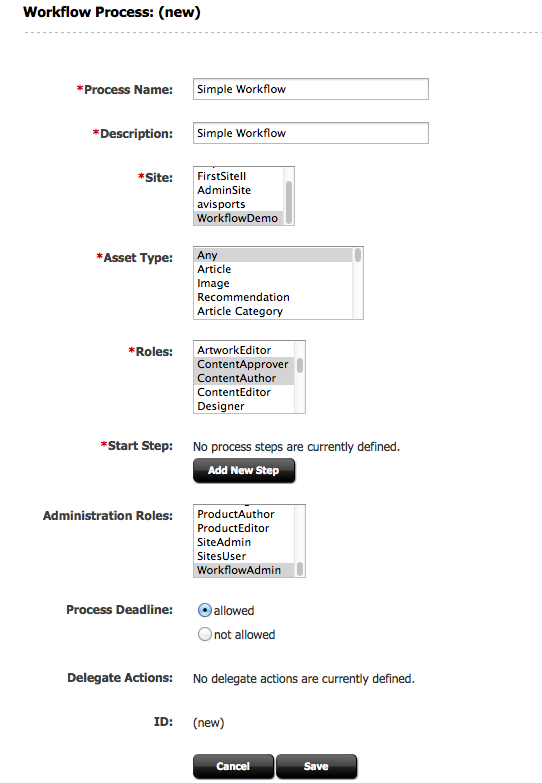
With all that filled out, click on “Add New Step” next to Start Step. Create the first step in our workflow, which we call "Send for Edit":
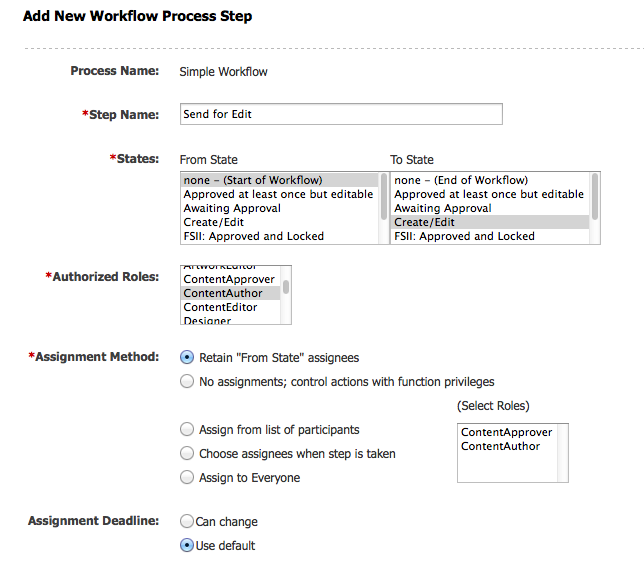
Once we have added the Start Step, add all the following subsequent steps according to our chart above:

After we have added all the steps in our workflow, we add the Function Privileges. We can allow and restrict as many Function Privileges to combinations of States and Roles as we need. For our example, we'll keep things simple. We'll just make sure that in any Awaiting Approval State, the ContentAuthor should have restrictions to Edit or Delete any content. Add the following Function Privilege restriction for the "Edit" function as follows, and do the same for the "Delete" function.
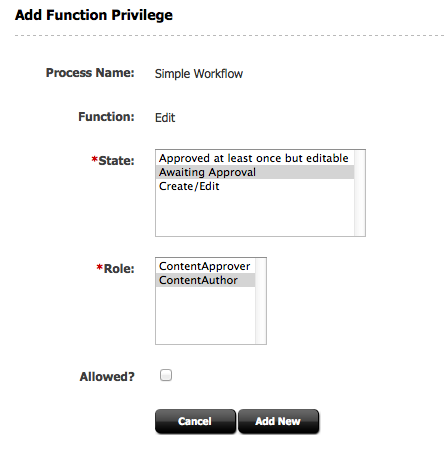
Make sure the Allowed checkbox is unchecked to restrict the State/Role combination access to these functions.
And there you have it! We've just created our first simple workflow in Oracle WebCenter Sites! Happy workflowing!
- Log in to post comments
