Contributing to Drupal Core
So you’ve decided to contribute to Drupal core! Fabulous! Welcome to the club! As with anything Drupal, there’s a slight learning curve, but nothing as daunting as learning Drupal in the first place. As always with almost anything Drupal, there’s a wealth of information and documentation available on Drupal.org.
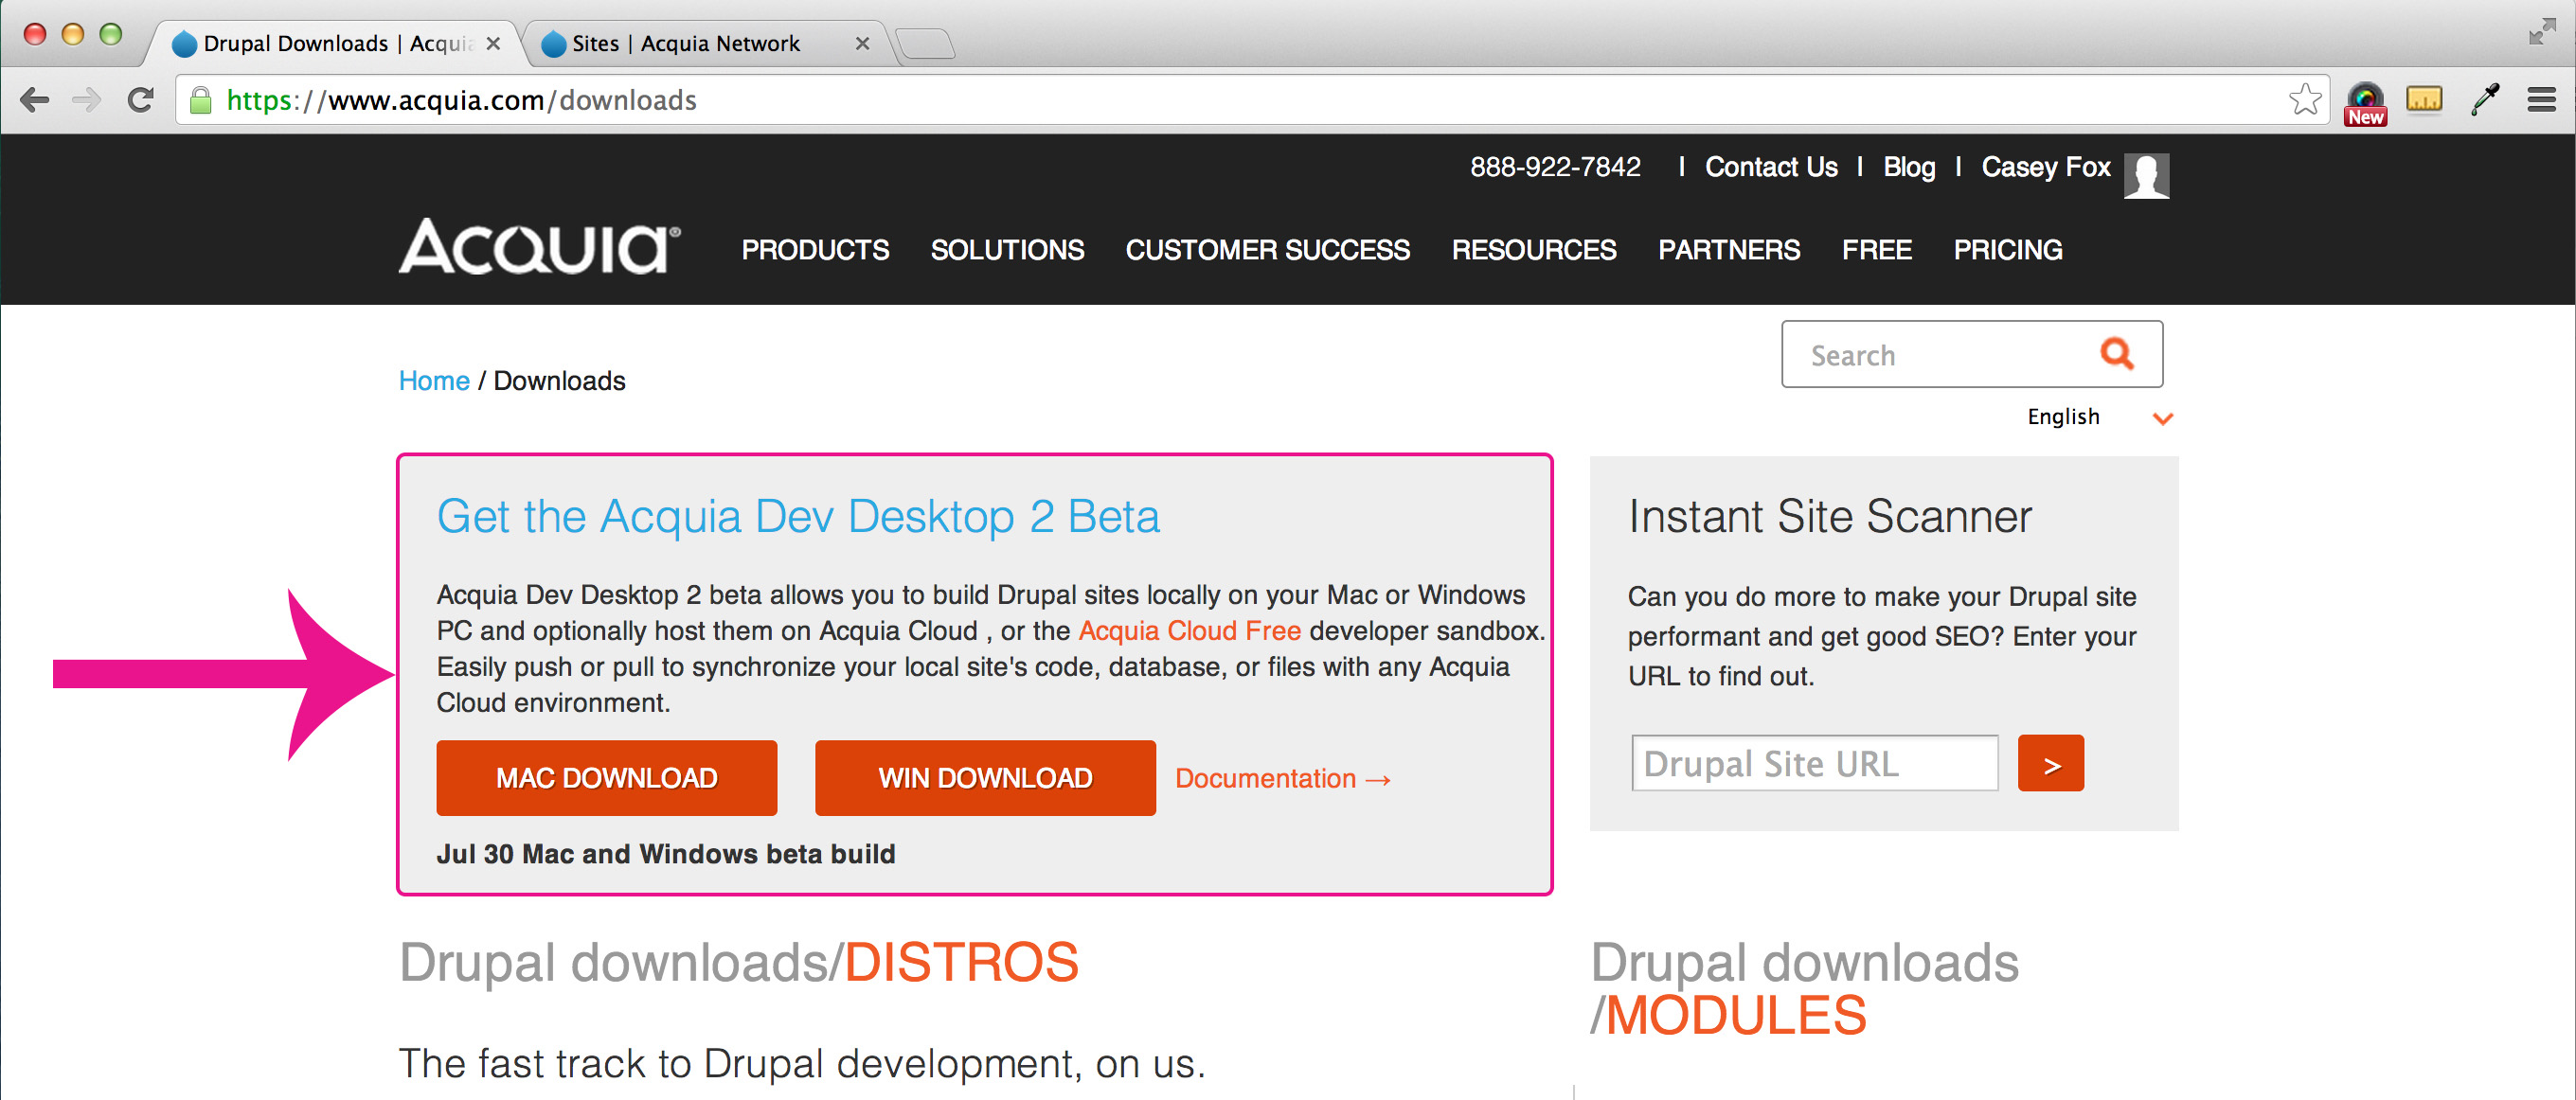
First things first, you need a dev environment. In this tutorial we’ll be talking about using the Acquia Dev Desktop Beta 2. Just install and launch and you’re ready to start. Take note of the base folder, as you’ll be installing the dev sites within. Start with downloading a copy of Drupal 8 via git and saving into a new folder within your dev site install. Naming is important, incase you end up with multiple projects, so call this drupal8. Next launch your new local site and go through the installation process. This is like any other Drupal install, and only takes a few minutes.
Now that we have a copy of Drupal 8 up and running let’s see how we can help. The place to start is the Drupal core issue queue. Use the controls at the top of refine the list, selecting 8.x as the version. All issues have a priority level, with critical issues needing to be resolved prior to a stable release of Drupal 8. Issues are color coded with the following structure:
-
Gray - All issues are “Active” and gray when they are initially added to the issue queue.
-
Yellow - Needs Review - Once a ticket has a patch uploaded or a plan in place (depending on the issue) the status of the ticket is updated to “Needs Review” telling the community to come test a patch or weigh in on the project plan.
-
Red - Needs Work - If a patch doesn’t import or fix the issue, or a new plan is proposed the issue is reset to Needs Work to signal to the community the issue needs more attention.
-
Light Green - Reviewed by the Community - Once a patch has been tested by at least 2 individuals or the plan approved by several users then the issue is updated to Reviewed and Tested by the Community.
-
Dark Green - Once the light green issues are committed to core they are marked completed and turned dark green.
-
Purple/Blue - Often issues are related to other issues and may not be relevant, so items can be postponed until other decisions are made.
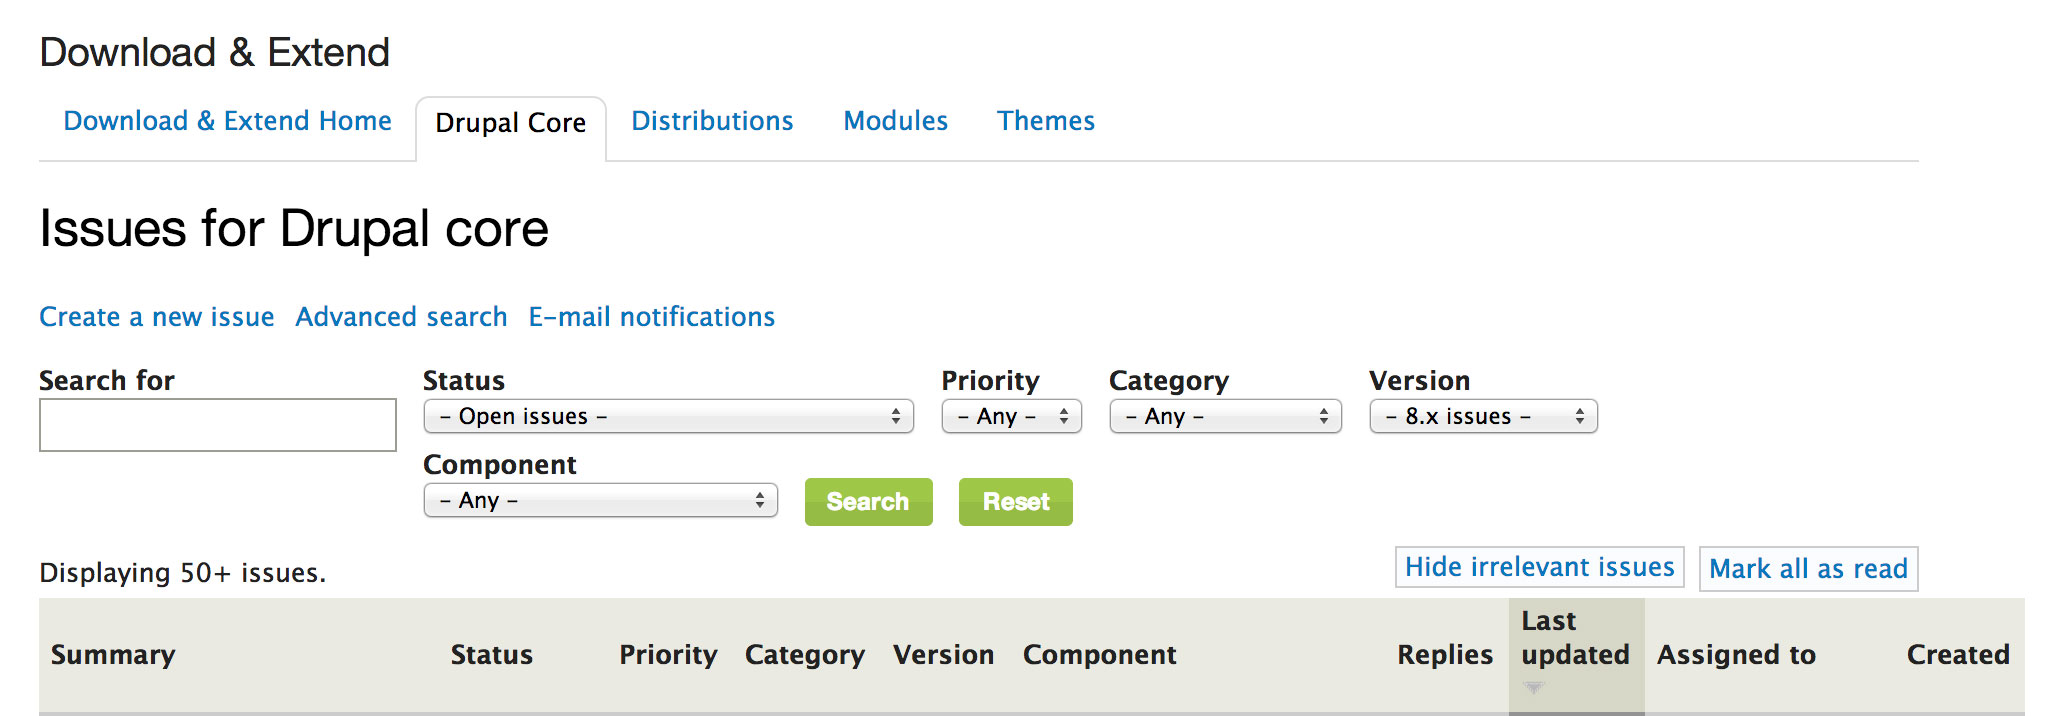
Searching for “novice” will yield all issues tagged for novice contributors, and is a great place to start. Yellow items are issues that need to be reviewed by the community. In general any patch needs to be reviewed at least twice before it’s committed to the core. When searching ensure you’ve set the Version in the issue search to “- 8.x issues -”.
Let’s check out how to apply a patch. We’ll use the command line, so first navigate to your folder (mine is located at /Sites/devdesktop/drupal8). It’s always a good idea to do a fresh git pull before applying a patch, so start with git pull. Then once you’ve selected the patch to test, create a new git branch by typing: git checkout -b [patch_name_or_issue_number] Next download a patch by clicking on the title of the patch (it’ll look something like this: https://www.drupal.org/files/issues/routing-2296205-11.patch), which opens up a new window. Save Page As… keeping the naming structure, and save it to your Drupal8 folder (so the patch would reside /devdesktop/drupal8/patch). Next we need to apply the patch via the command line by typing: git apply [patch] -v
Here’s what a typical patch looks like:
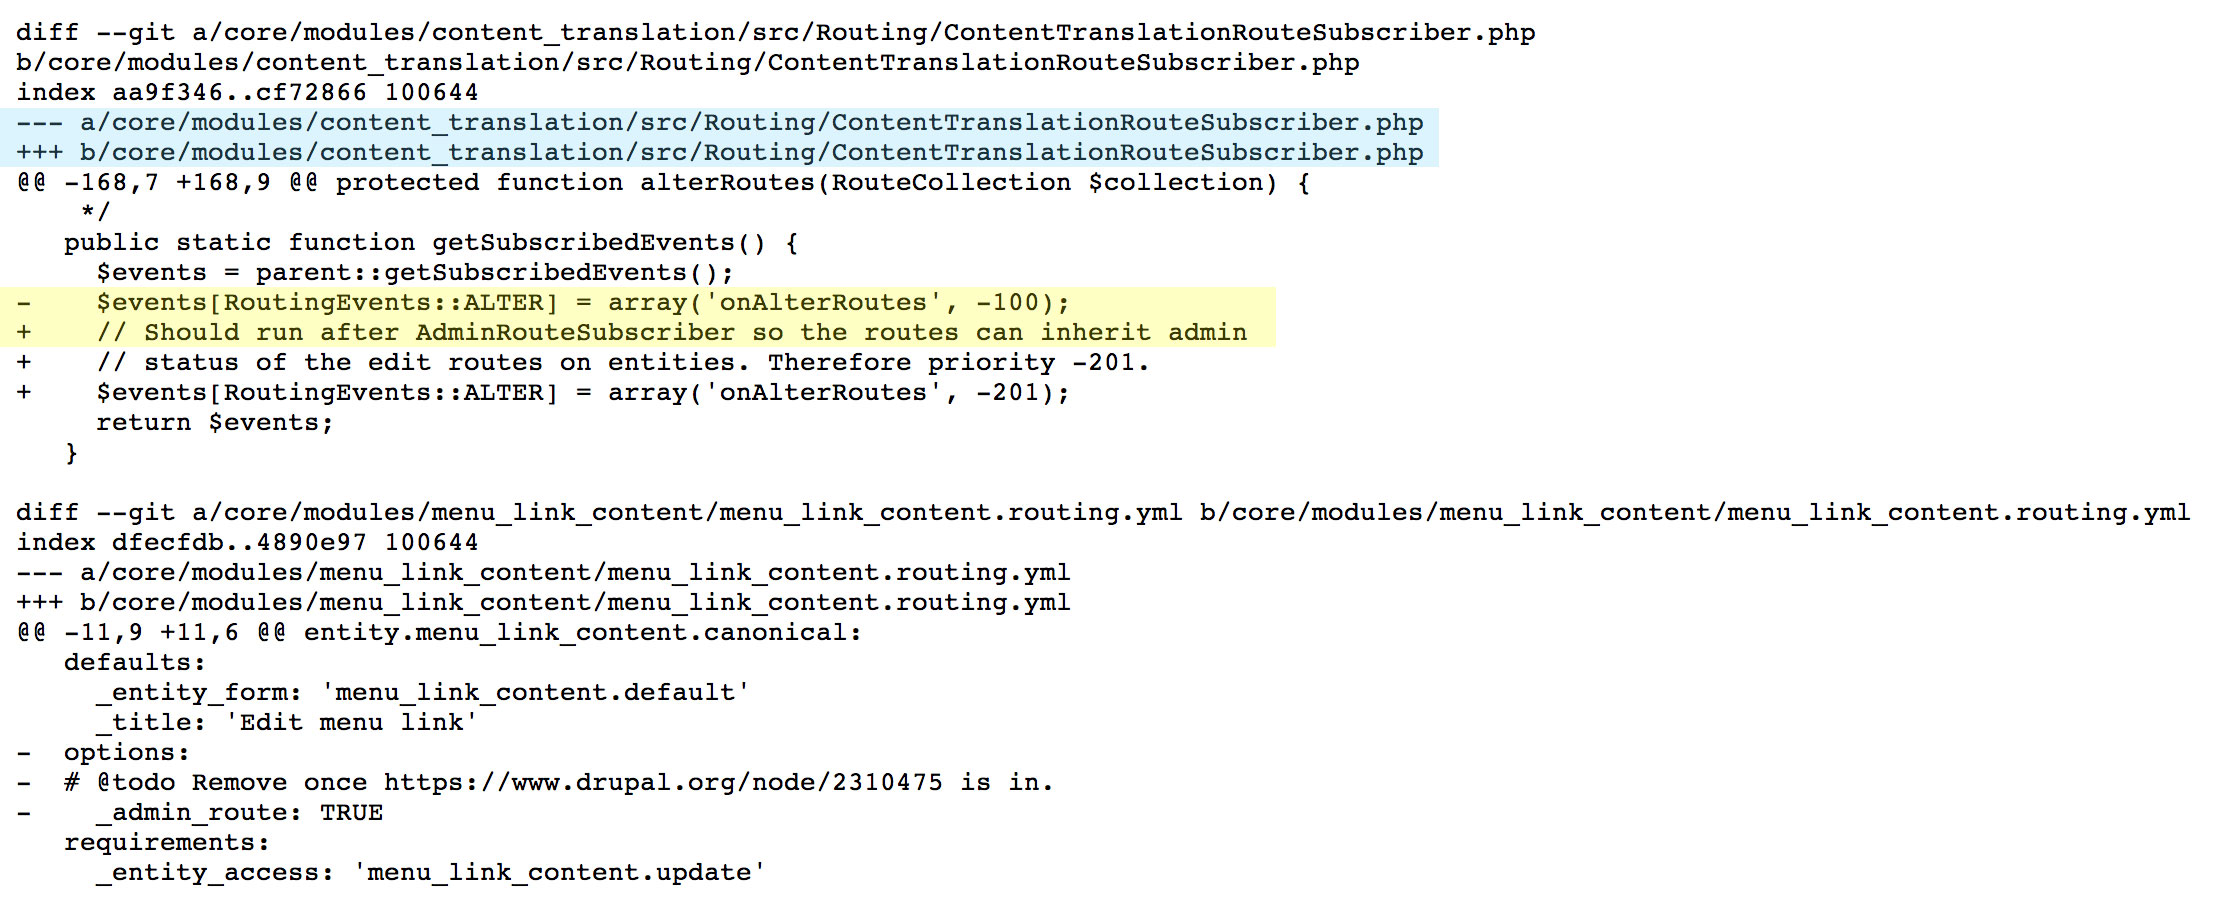
On the first line you’ll notice the diff command, which is used in creating the patch (more instructions for that below). Highlighted in blue you will see the file the first part of the patch is targeting, then in yellow the pluses and minuses for which code was removed and added. If multiple files were updated (as in the example) you’ll see another diff and the next file tweaked.
If your patch is something visual, it’s good to take screen shots before and after to verify the patch did what it should. Once you take the before screen shots apply the patch, clear the cache and verify the updates. If it’s a code change that may not be visible, check the file before you apply the patch and after the ensure it’s been correctly updated and nothing else broke (the robot normally rejects patches that could break the system in some way, but it’s not a perfect system). If the patch worked as described report back to the issue, adding images if applicable. If you are the first to review leave the status as “Needs Review”, if you’re the second change the status to “Reviewed and Tested By the Community”. That’s it, you’ve reviewed your first patch!
Sometimes patches don’t apply, and that can be for a number a reasons. Sometimes patches are created and then not tested for weeks, while other patches end up contributed to the core which make this one obsolete or break. If it does not apply for some reason (you’ll see an error in the command line) report that back to the issue queue as well and set the status to “Needs Work”. This tells the community that the issue is no longer ready to be tested and someone who is looking for a patch to work on can pick it up.
Once you’ve reviewed a few patches and are comfortable with the system you can move on to creating your very own patch! This is where it gets exciting, well for geeks like myself! We start with the good ole’ git pull and scouring the issue queue for something we think we can handle… which actually can take quite a while. During the Core Sprints at DrupalCon Austin it took me a solid hour to find the first issue I felt I could create a patch, of course there were 250+ other people doing the same thing, so assuming it’s not a conference week, you shouldn’t have as much “competition”.
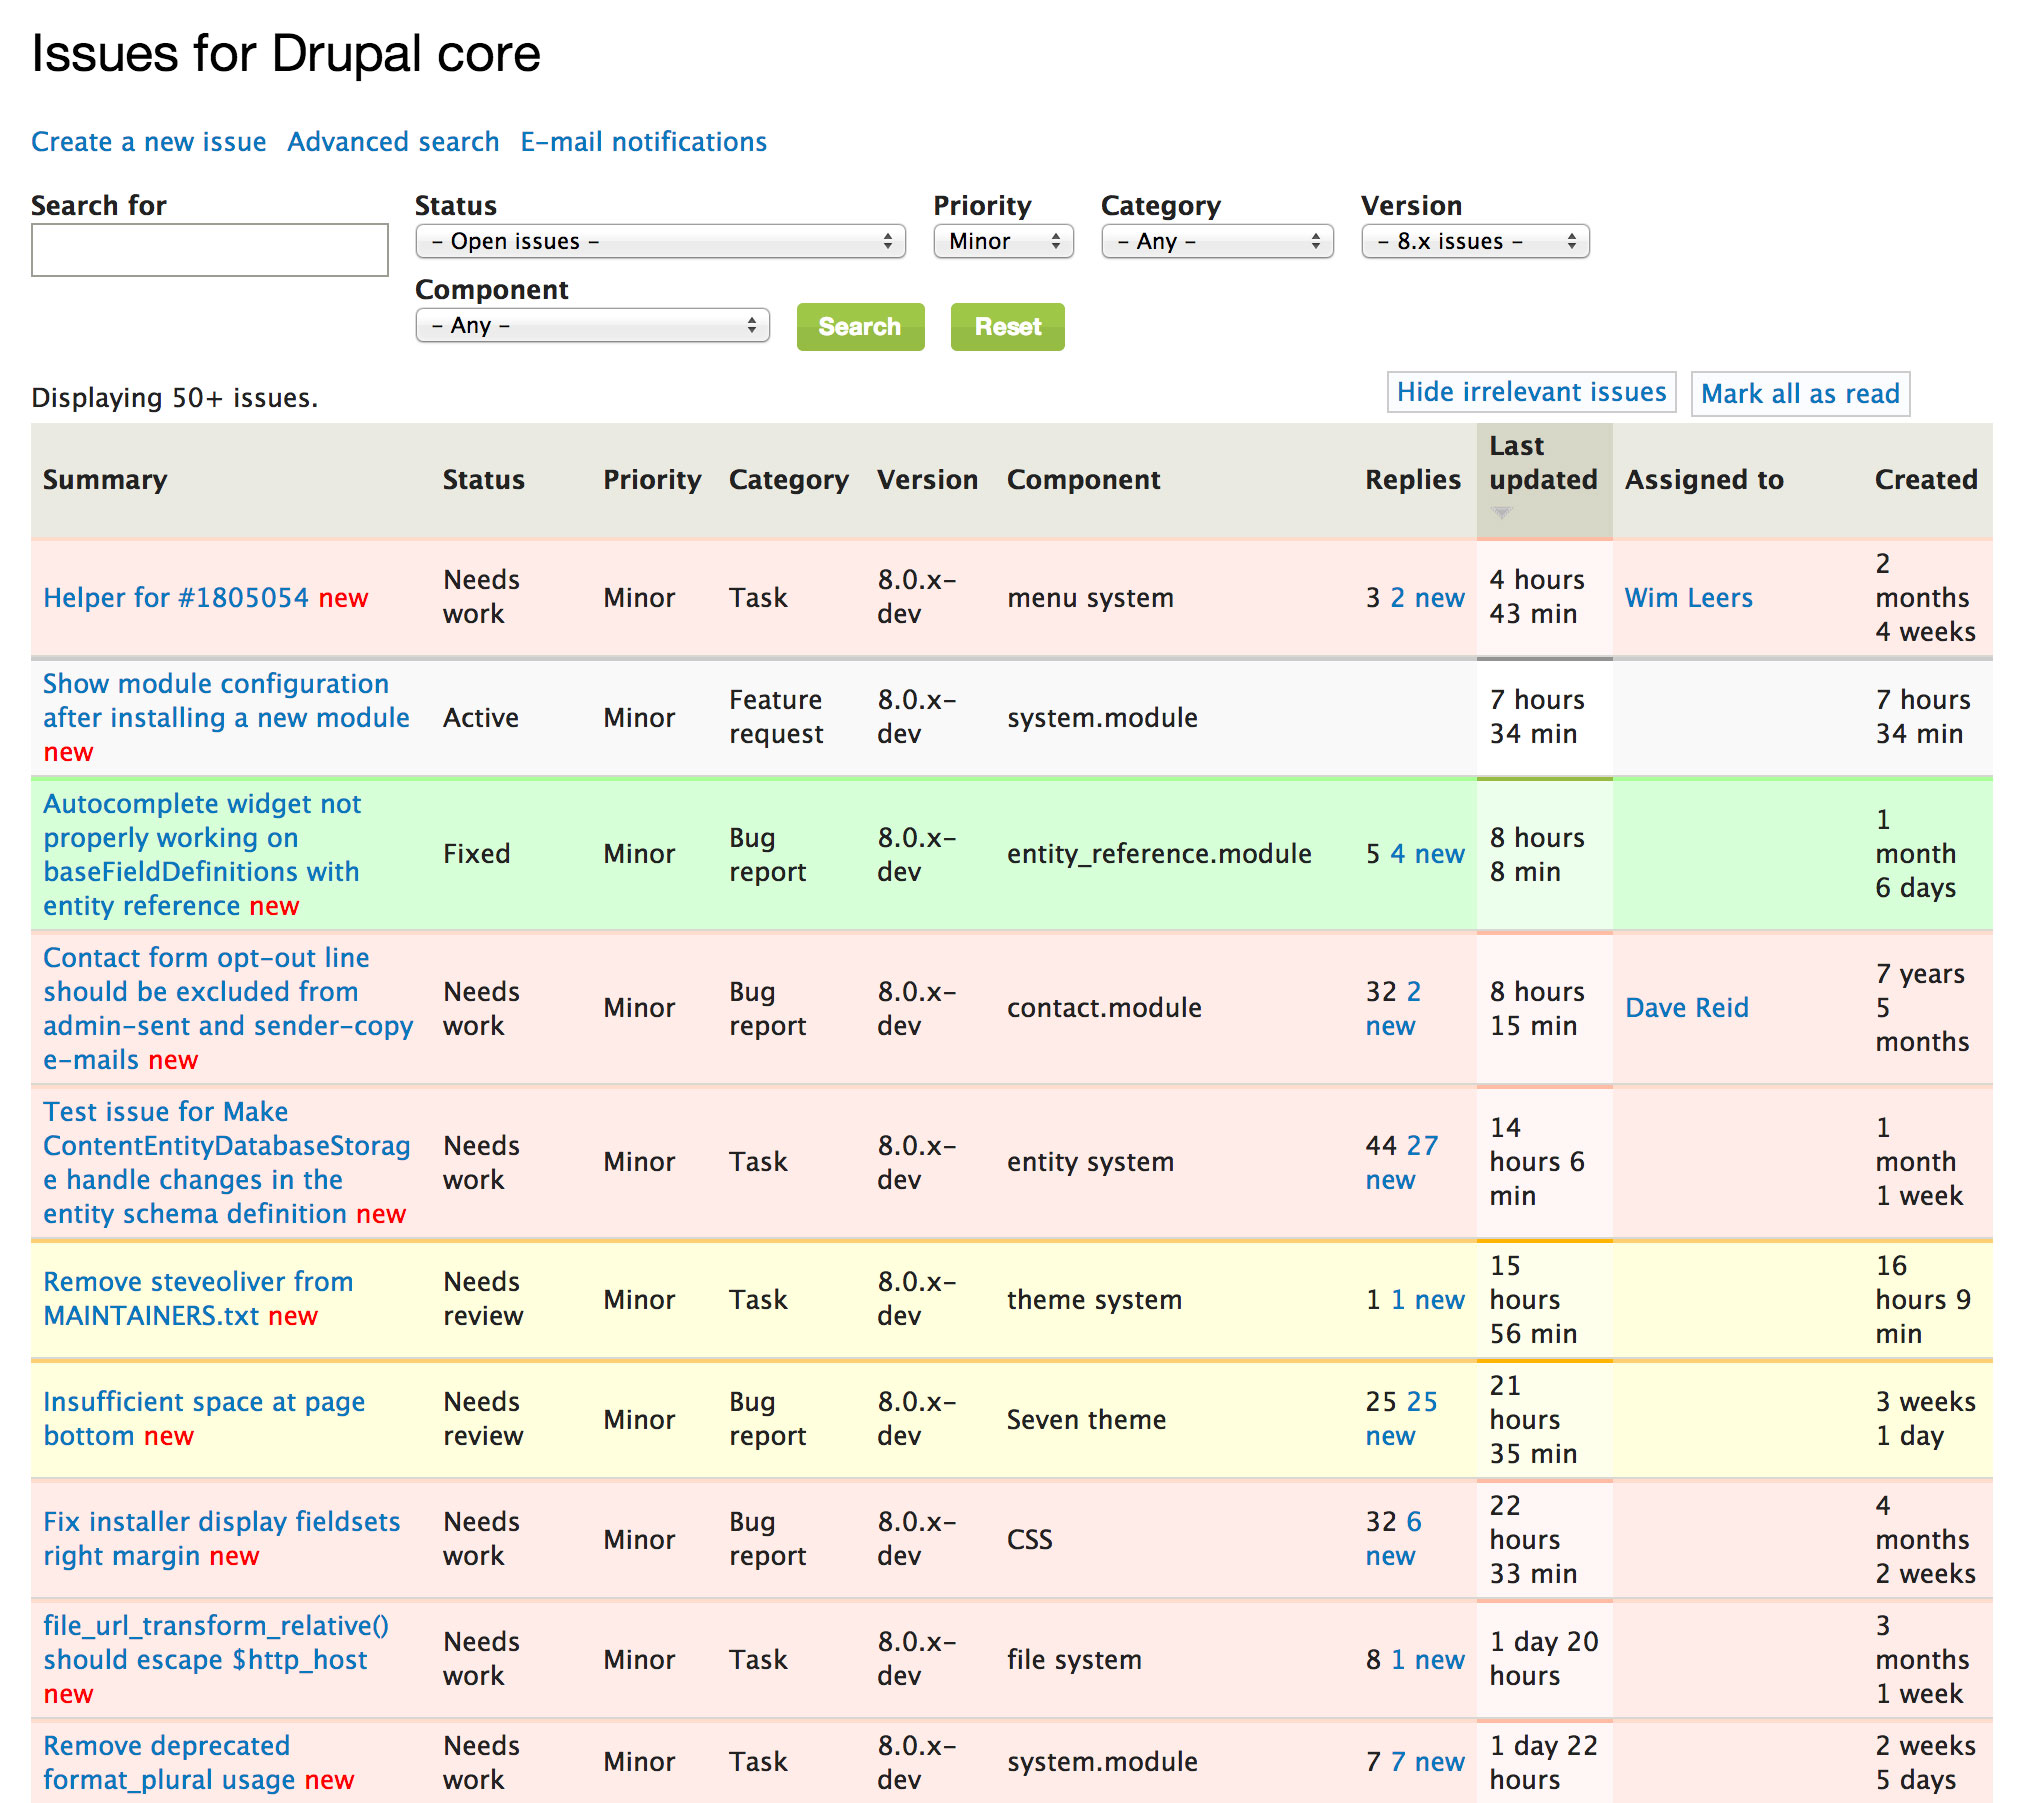
I utilize the search bar to refine the issues I see, which is great to not feel as overwhelmed. You’ll most likely find a lot of issues that you feel are over your head. Once you get more familiar with Drupal speak and the Core it’ll become easier to understand. For my search I wanted to only see open issues (which will still show items that have been completely, just not closed by the system), Minor Priority, as they are normally on the easier side, Any Category (Bug Report, Task, Feature Request, etc), Drupal Version 8, and Any Component. You can select a specific component, such as the Theme System if that’s where you are most familiar, but then consider not setting the priority, which tends to limit tickets. My search below resulted in 132 tickets, a few being green and completed, the bulk yellow and gray.
Once you find an issue that looks good, assign it to yourself or post at the bottom that you are looking into it. At DrupalCon someone said that even for the very long issues with 100+ comments, at the moment where you are reading through the whole thing you now the most knowledgeable about that issue. Don’t be afraid to give it a go. I like assigning them to myself, as when I scour the issue queue I look for issues specifically not assigned to anyone to work on. Purely personal preference.
Now that you’ve assigned the issue to yourself back on your local create a new branch. I like to use the issue number for the branch name, essentially guaranteeing there won’t be any conflicts. Update the files needed to fix the issue. Once you have it fixed and tested yourself, it’s time to create the patch, which isn’t nearly as scary as it sounds. It’s essentially three git commands: git add [file] git commit -m "[include issue #]" git diff 8.x [issue/branch name/number]> [issue#-comment#].patch
Good naming convention for patches are the issue number dash the comment number of your patch (for example issue number 455678 and currently has 22 comments in the thread: patch would be: 455678-23.patch, as your comment posting the patch would be number 23). Patch naming is important because one issue may end up with a dozen+ patches, and this way they are better organized. Your patch will now be sitting in the drupal8 folder on your local dev. Go back to the issue, upload the patch, write a little something in the comments about what you did, set the status to “Needs Review”, and that’s it. You’ve uploaded your first patch! In a few minutes the bots will test the patch to make sure it passes review, if not you’ll need to tweak and re-submit. There have also been times the bot has been broken… If you’re not sure why the patch failed don’t be afraid to reach out to the community! I had an issue where I posted 3 patches that failed, had someone help me, and finally got a successful patch, which was committed to the core.
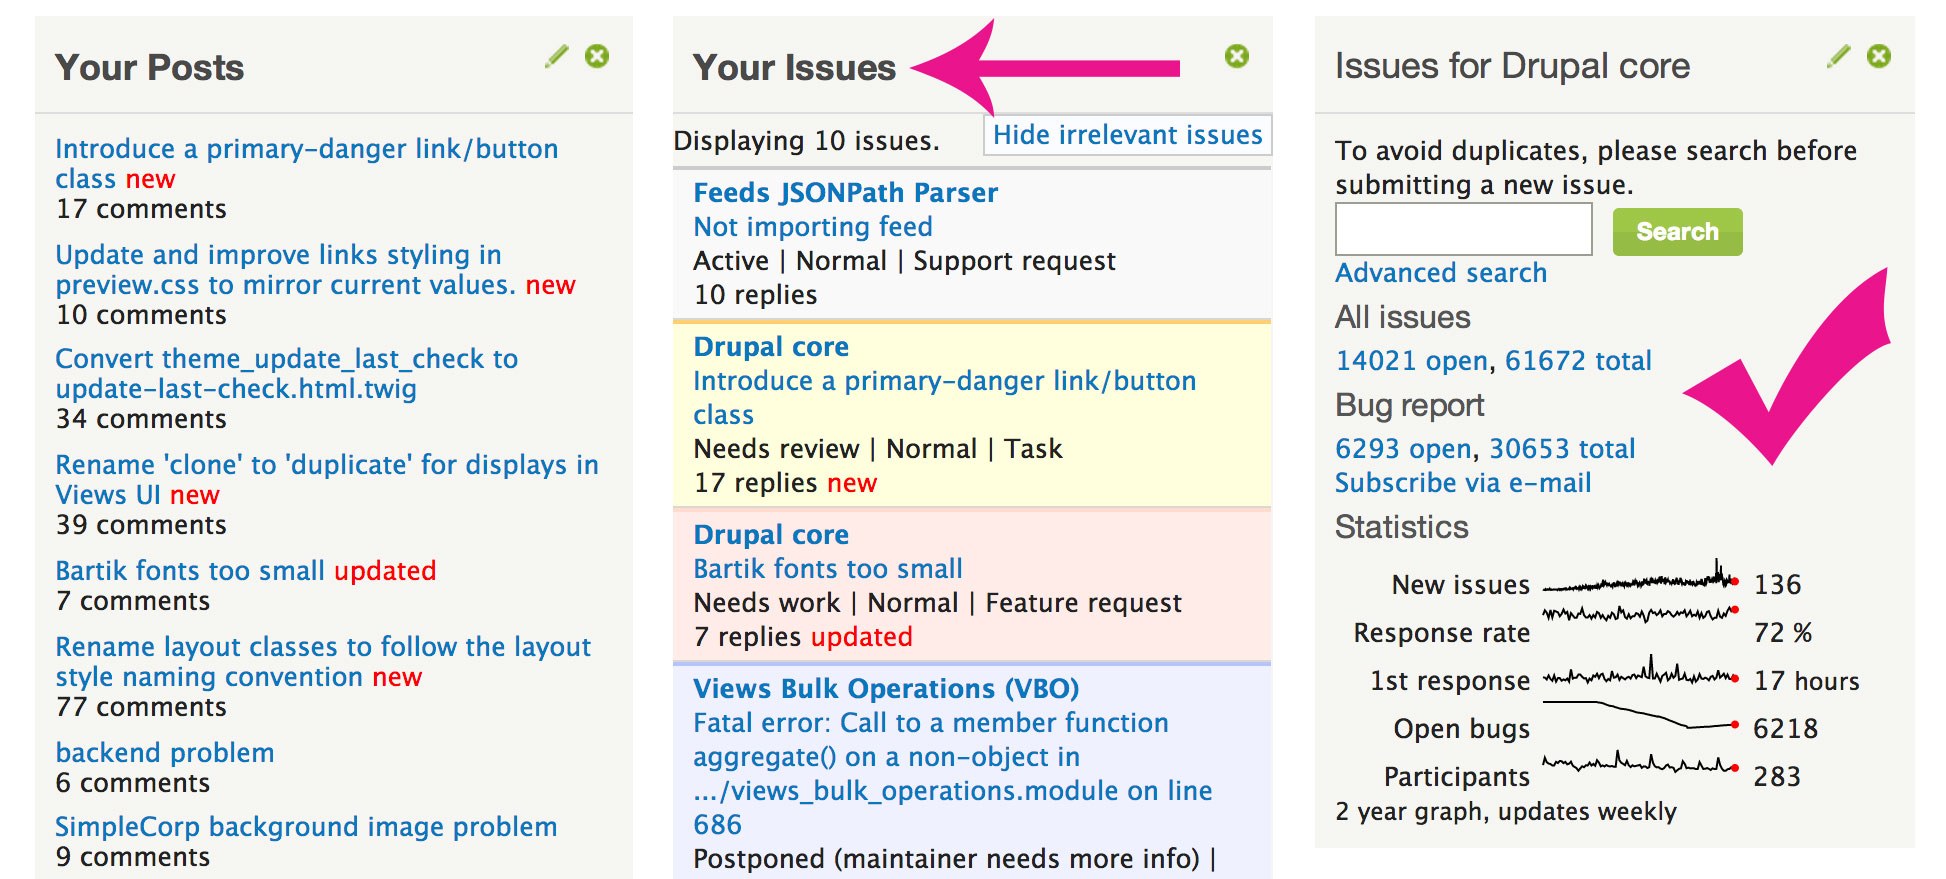
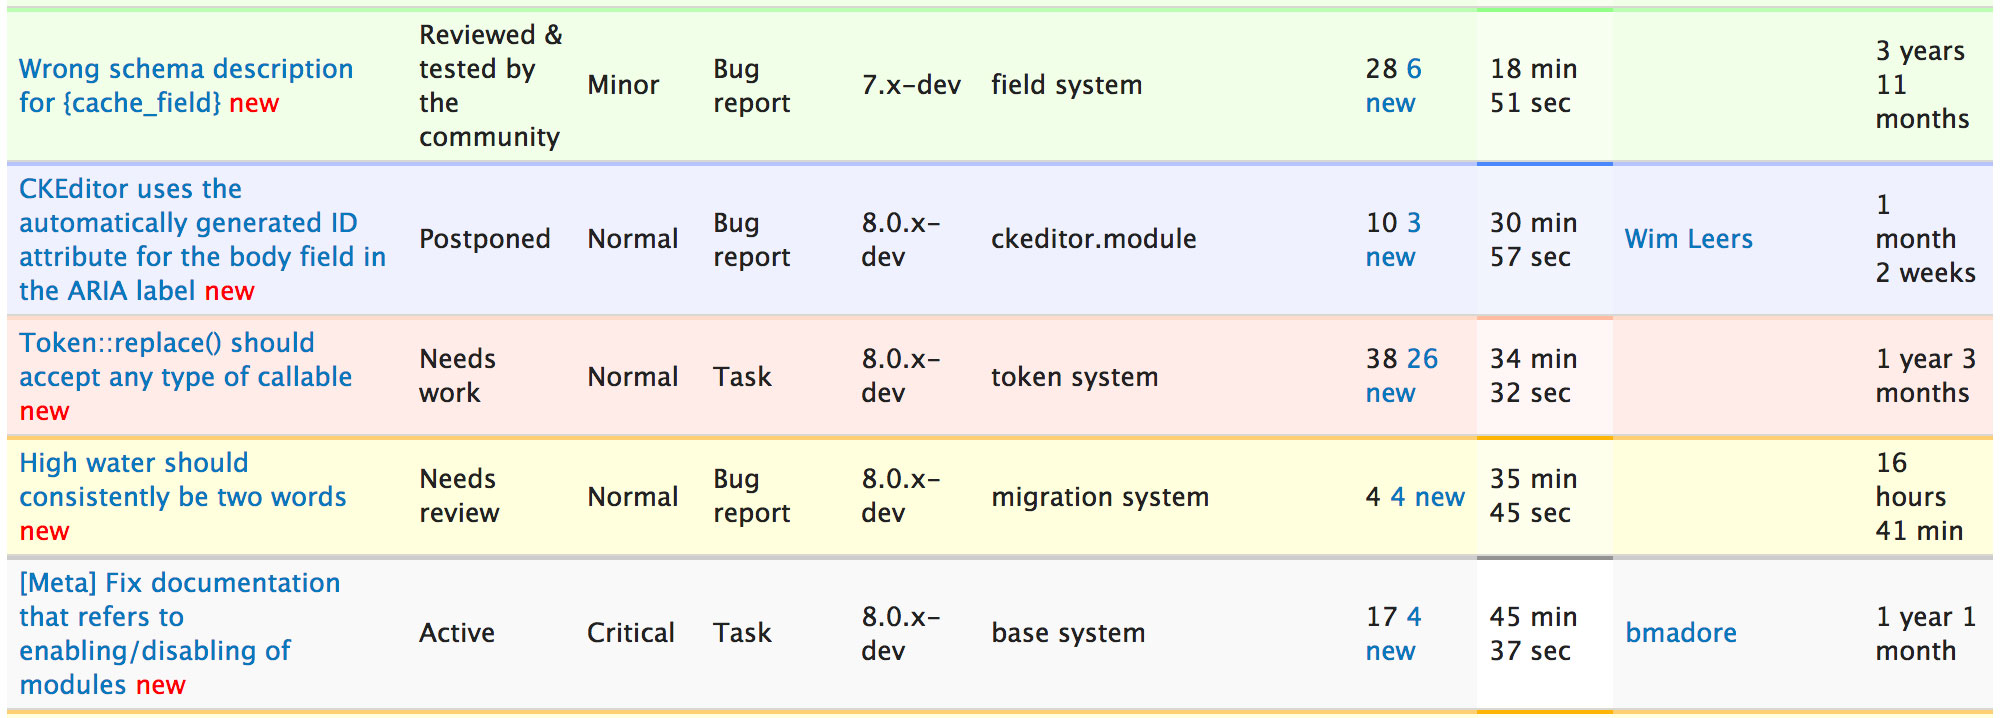
Once your patch is reviewed and tested it will be added to the core. This process can take a while, so don’t sweat it if it’s been a week and nothing has happened, just get back in the queue and find your next issue! You’ll be able to easily track the activity of all your issues from your profile (above image). You can also go directly to the Drupal Core Issue Queue from your profile as well. There’s other ways you can help if you’re not in a coding mood or don’t see anything you feel you can handle. There are multiple other ways to help out in the community including posting in the Drupal forums where many users post issues there on a daily basis, assist with documentation, or translations, etc. The resources below have additional ways to contribute!
Resources:
Drupal Core Issue Queue: https://www.drupal.org/project/issues/drupal
Drupal Git Instructions: https://www.drupal.org/project/drupal/git-instructions
Drupal Contribution Info: https://www.drupal.org/contribute/development
- Log in to post comments
