How to create a custom left navigation pane in WebCenter Sites Contributor UI (11.1.1.8)
In this blog, I would like to show how to create a custom left navigation pane in contributor UI for 11g. As the name suggests, navigation panes are used to show trees or navigation hierarchy for assets within a site.
To create a new navigation pane, we will, first need to extend the LeftNaviagtionConfig element. This element can be found here:
UI/Layout
Copy content of this element into a new CSElement. For this example, create the following element.
CustomElements/<your site name>/UI/Layout/LeftNaviagtionConfig
This new element will now be used for left navigation pane configurations.
Config element has following xml structure:
<leftnavconfig>
      <panes>
            <pane></pane>
            <pane></pane>
            <pane></pane>
      </panes>
</leftnavconfig>
To add a new pane, add a <pane></pane> block
For example, add following xml anywhere within <panes></panes> block
<pane id="customPane" label="Custom Pane" iconClass="siteTreeIcon">
    <content>
        <source>UI/Layout/LeftNavigation/customNav</source>
    </content>
</pane>
Here “id” is the unique id for this pane and “label” is the actual name displayed in the pane.
That’s it for configuration.
To display some test content, create following action and view CSElements
Create: UI/Layout/LeftNavigation/customNavAction
Add following code snippet into this element.
<ics:setvar name="foo" value="bar"/>
Create: UI/Layout/LeftNavigation/customNavHtml
Add following code snippet into this element
<ics:getvar name="foo"/>
Save both elements, clear browser cache and refresh contributor UI.
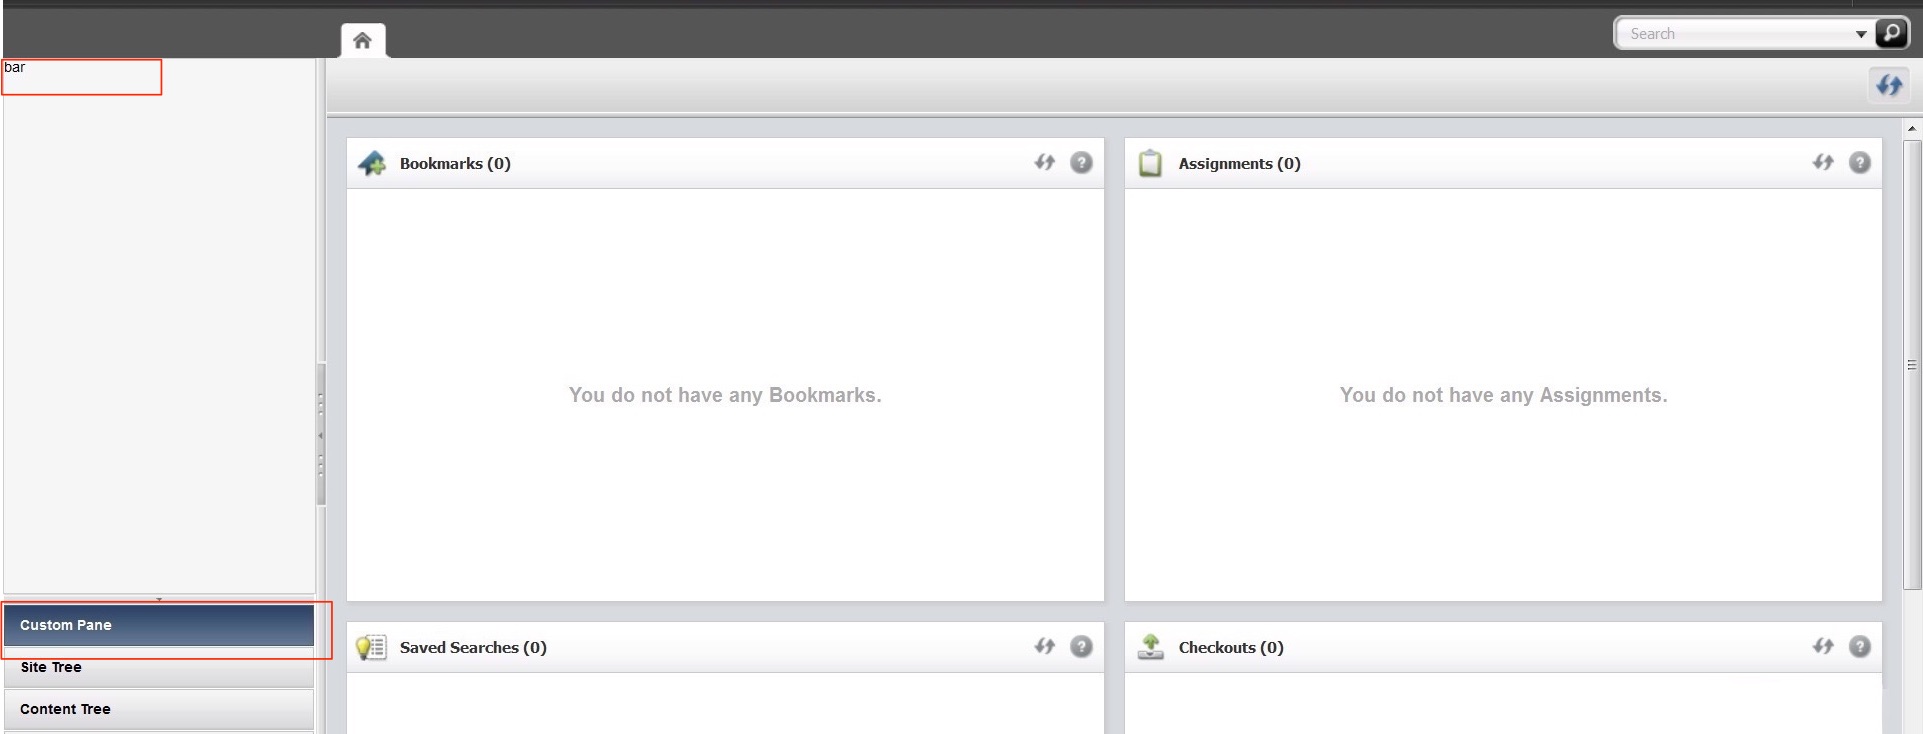
Now you should see the custom pane with test content. This is a very simple example, just to demonstrate the steps. To build a custom asset tree, one could modify an existing pane in LeftNaviagtionConfig or implement a custom dijit tree.
- Log in to post comments
