Splunk, Now You See Me, Now you Don't!

Splunk allows customers the flexibility to create their own visualizations. While at a customer we created a cool way to hide and have panels pop up when you click on a single panel. All of these searches are internal so you can test on your Splunk Instance, and then change it to your desired results!
The Simple XML will look something like this:
<dashboard script="example_single_panel_inline_drilldown.js">

<label>Single panel inline drilldown</label>

<row>

<panel>

<single>

<searchString>index="_internal" sourcetype="splunkd" | stats count by component | sort by count desc</searchString>

<earliestTime>-10s</earliestTime>

<option name="field">component</option>

<option name="linkView">search</option>

<option name="drilldown">none</option>

<option name="underLabel">Top component</option>

</single>

</panel>

<panel>

<single>

<searchString>index="_internal" | stats count by sourcetype | sort by count desc</searchString>

<earliestTime>-10s</earliestTime>

<option name="field">sourcetype</option>

<option name="linkView">search</option>

<option name="drilldown">none</option>

<option name="underLabel">Top sourcetype</option>

</single>

</panel>

</row>

<row>

<table>

<title>Components by count</title>

<searchString>index="_internal" sourcetype="splunkd" | stats count by component | sort by count desc | head 20</searchString>

<earliestTime>-10s</earliestTime>

</table>

</row>

<row>

<table>

<title>SourceTypes by count</title>

<searchString>index="_internal" | stats count by sourcetype | sort by count desc | head 20</searchString>

<earliestTime>-10s</earliestTime>

</table>

</row>

</dashboard>
For this example, we need two Java Scripts.
Let’s first start out with the one that will need to be changed by you. Unless you have the same number of panels for every dashboard that you are creating this for, this will need to be changed each time. This works with another Java Script that we will get into later. The example below refers to it, so make sure you place these in YOUR designated app in $SPLUNK_HOME/etc/{yourapp}/appserver/static
For this script, what it is saying is that for the first element or single value panel, when you click on it, display the dashboard in row 2 of the XML.
require(['../app/myapp/single_panel_inline_drilldown'],

function(inlineDrilldown){

var linkedElements = {"element1":".dashboard-row2",

"element2":".dashboard-row3",

};


inlineDrilldown(linkedElements);


});
So like this:

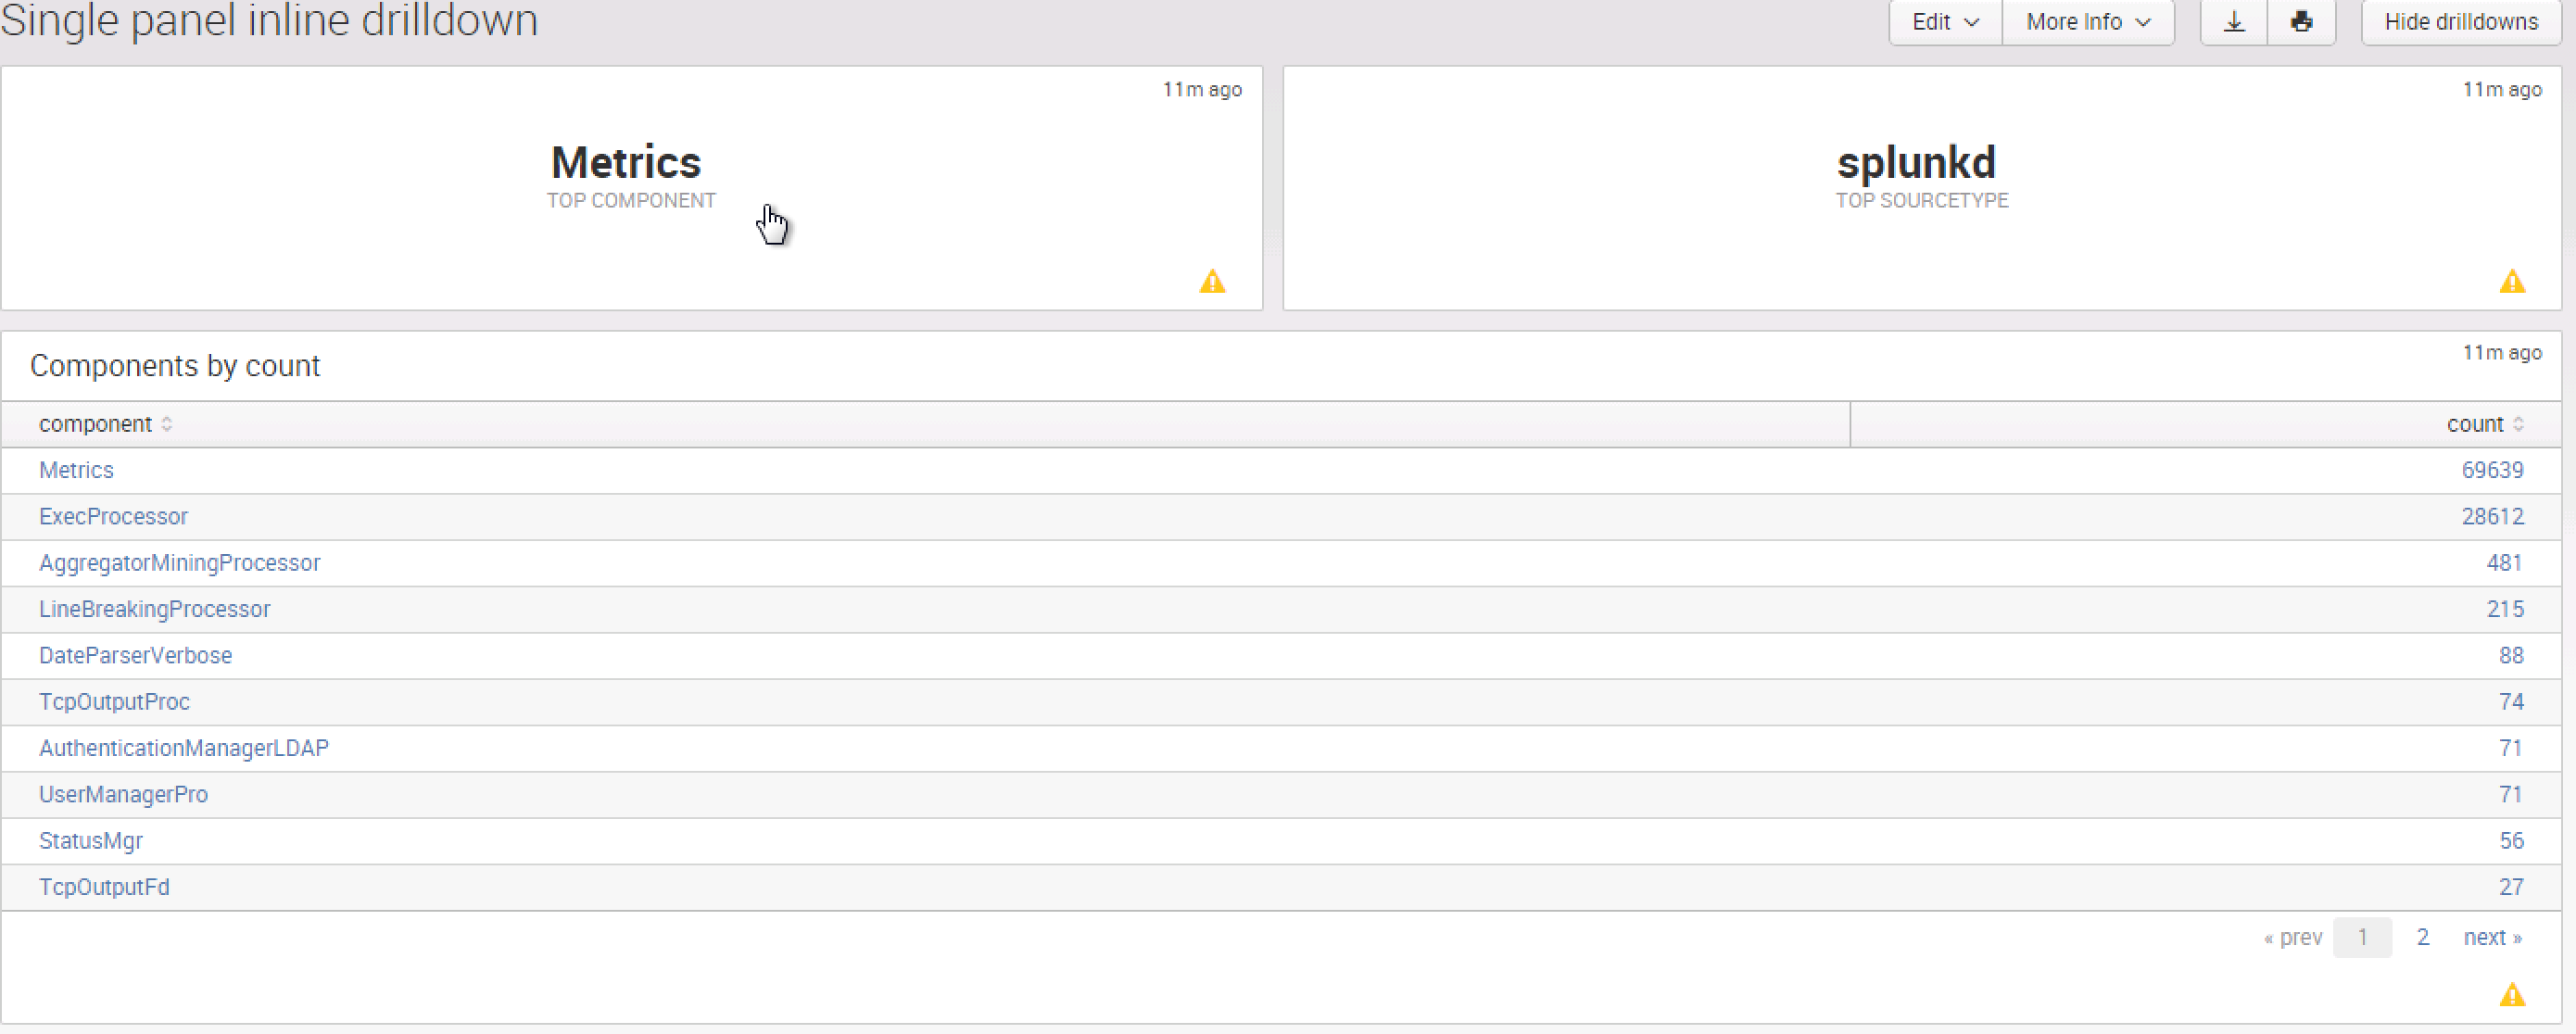
So when I click on Metrics as shown here, a table will pop up the table that is in your XML in ROW 2:
Now if you want to go back to just having the two Single Panels, we also created a Hide Drilldown Button that is on the top right. You will need this Java Script which creates the click function and hide drilldown function. Again, make sure you place these in YOUR designated app in $SPLUNK_HOME/etc/{yourapp}/appserver/static
 /*

Let's single panels drilldown to other panels in same dashboard.

linkedElements - {'element1':'.panel_abc',

'element2':'#panel_id_123', ...}

The key has to be element id for single panel, so "element3" and such.

The value can be any jQuery search string, so #some-id for id, or .some-class for class,

or anything else jQuery can understand.


*/


define(function(require, exports, module) {

$ = require('jquery');

_ = require('underscore');

mvc = require('splunkjs/mvc');

SingleElement = require('splunkjs/mvc/simplexml/element/single');

DashboardView = require('splunkjs/mvc/simplexml/dashboardview');

require('splunkjs/mvc/simplexml/ready!');


drilldownToPanel = function(linkedElements){

var hideAll = function(){

_(linkedElements).chain().values().each(function(elid){

$(elid).hide();

});

};

// first hide all hideable panels

hideAll();


// attach click events to single panels

_(mvc.Components.toJSON()).chain().filter(function(el) {

return el instanceof SingleElement && _(_(linkedElements).keys()).contains(el.id);

}).each(function(singleElement) {

singleElement.getVisualization(function(single) {

singleElement.$el.find(".splunk-view.splunk-single").click(function(){

// hide all, then show needed one

hideAll();

$(linkedElements[singleElement.id]).show();

}).css('cursor', 'pointer');

});

});


// Add button for hiding all drilldown panels

_(mvc.Components.toJSON()).chain().filter(function(el){

return el instanceof DashboardView;

}).each(function(dashboard){

var menuView = dashboard.editControls.children.menuView;

// Wrap render of edit menu to include our own code after it.

menuView.render = _.wrap(menuView.render, function(fn){

var ret = fn();

$('<div class="btn-group"><a class="btn hide-drilldowns-btn">Hide drilldowns</a></div>')

.appendTo(ret.$el.find('.dashboard-view-controls'));

ret.$el.find('.hide-drilldowns-btn').on('click', hideAll);

return ret;

});

});


};

return drilldownToPanel;


});
When you click the Hide Drilldown, like magic you go back to where you started!

I can’t wait to hear about how you used this for your environment! Be creative, make it your own, and work some Splunk magic!
- Log in to post comments
